
In case you didn't know, Android has an awesome hidden settings menu called "Developer options" that contains a lot of advanced and unique features. If you've ever come across this menu before, chances are you just dipped in for a minute so that you could enable USB debugging and use ADB features.
But there are plenty of other cool things you can do with this menu, it's just that most entries aren't exactly labeled in plain English, so they're not very easy to discover. In an effort to curb all of that, I'll show you some of the most interesting Developer options settings below.
Enabling Developer Options
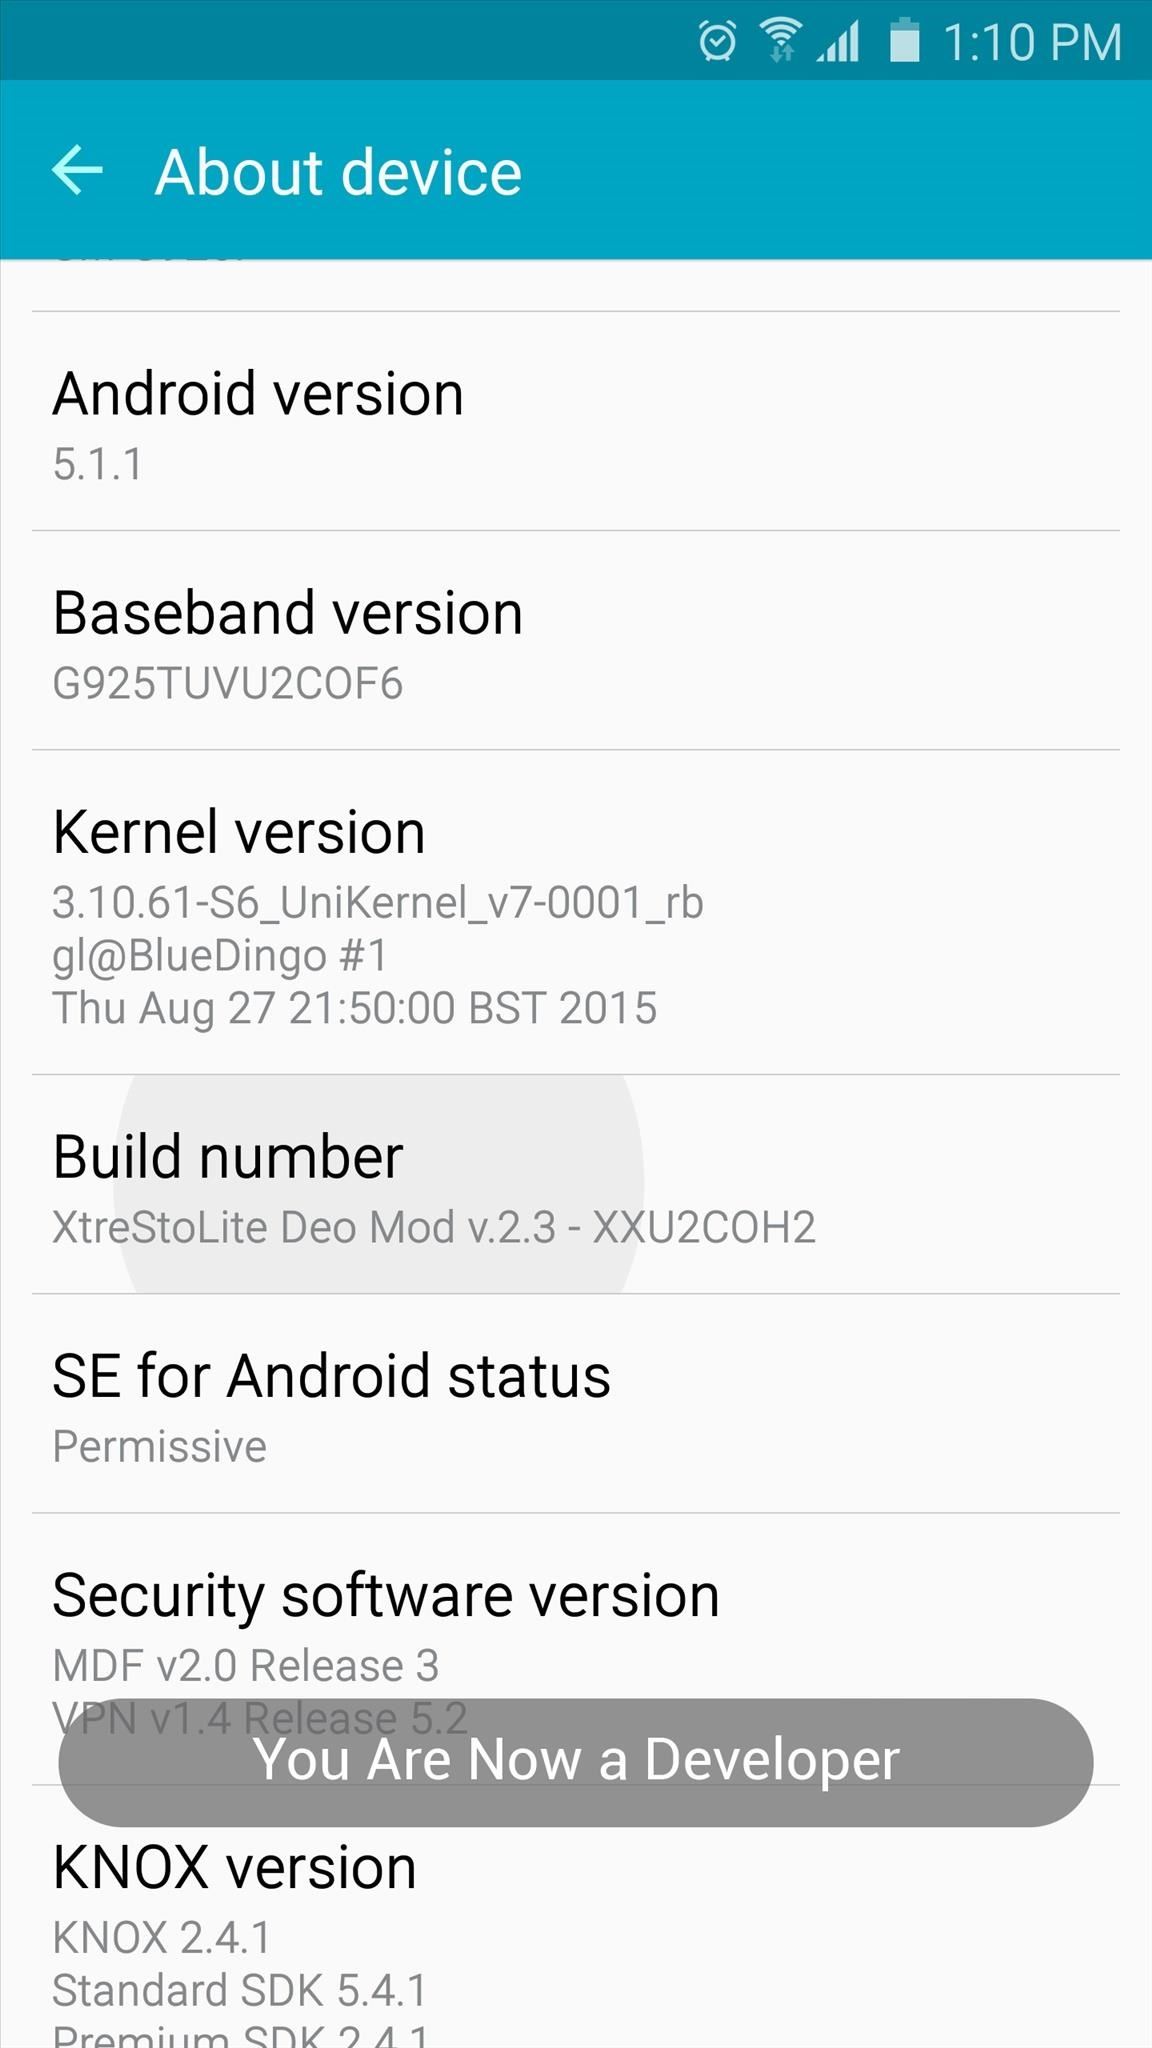
In order to access any of these cool options, you'll first need to unlock the hidden Developer options menu on your device. To begin, head to the main Settings menu, then select About phone, About tablet, or About device. From here, tap the "Build number" entry 7 times in rapid succession, and you'll get a toast message informing you that the Developer options menu has been unlocked.
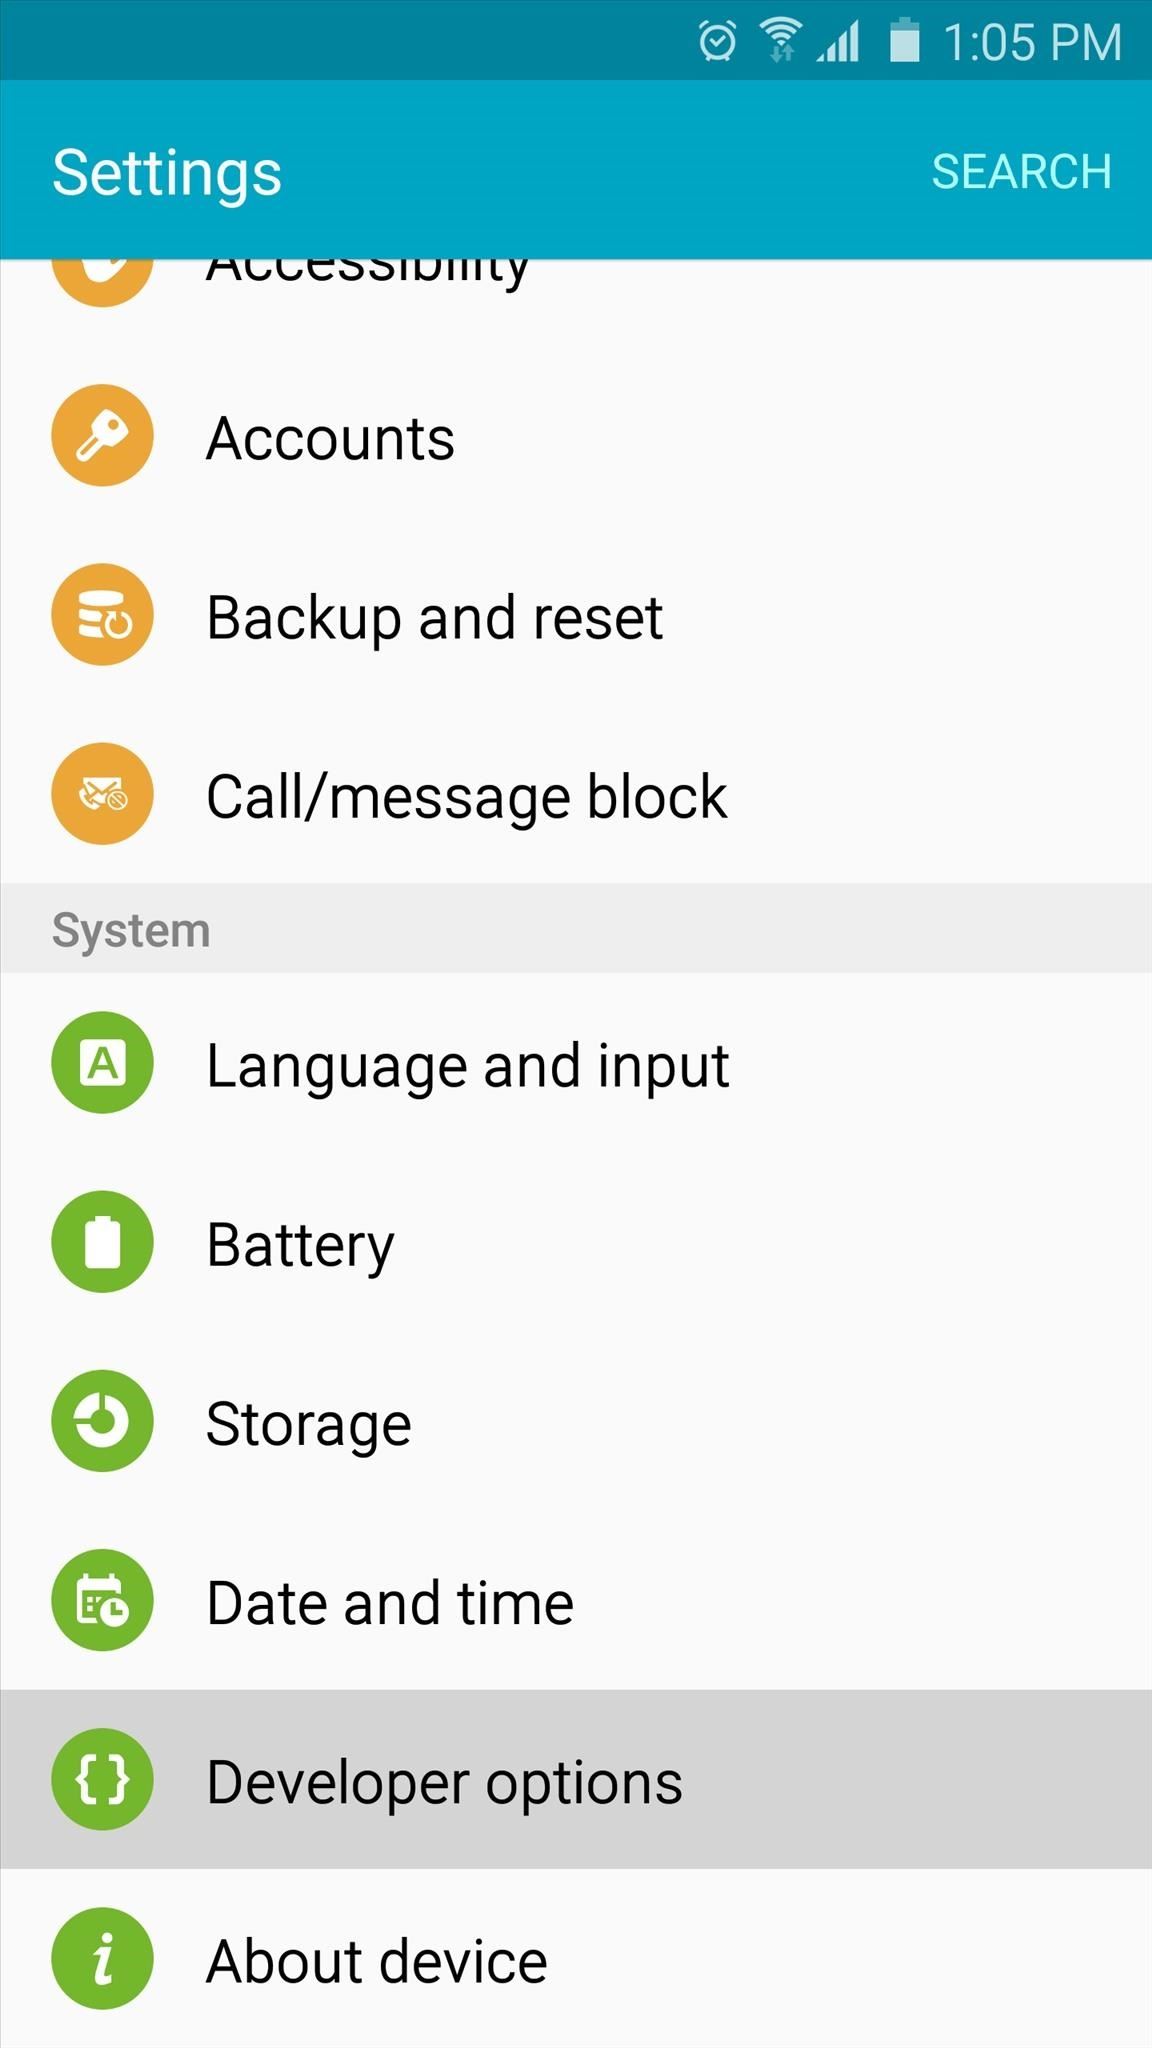
From here, just back out to the main Settings menu again, and you'll find the new "Developer options" entry near the bottom, so go ahead and select it.
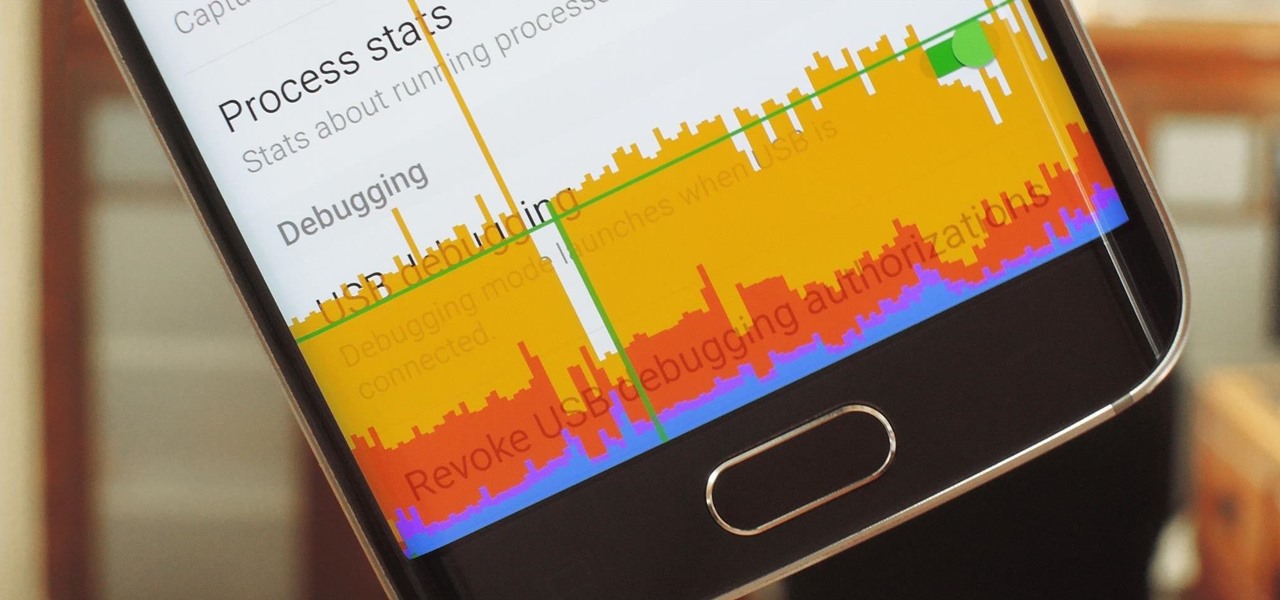
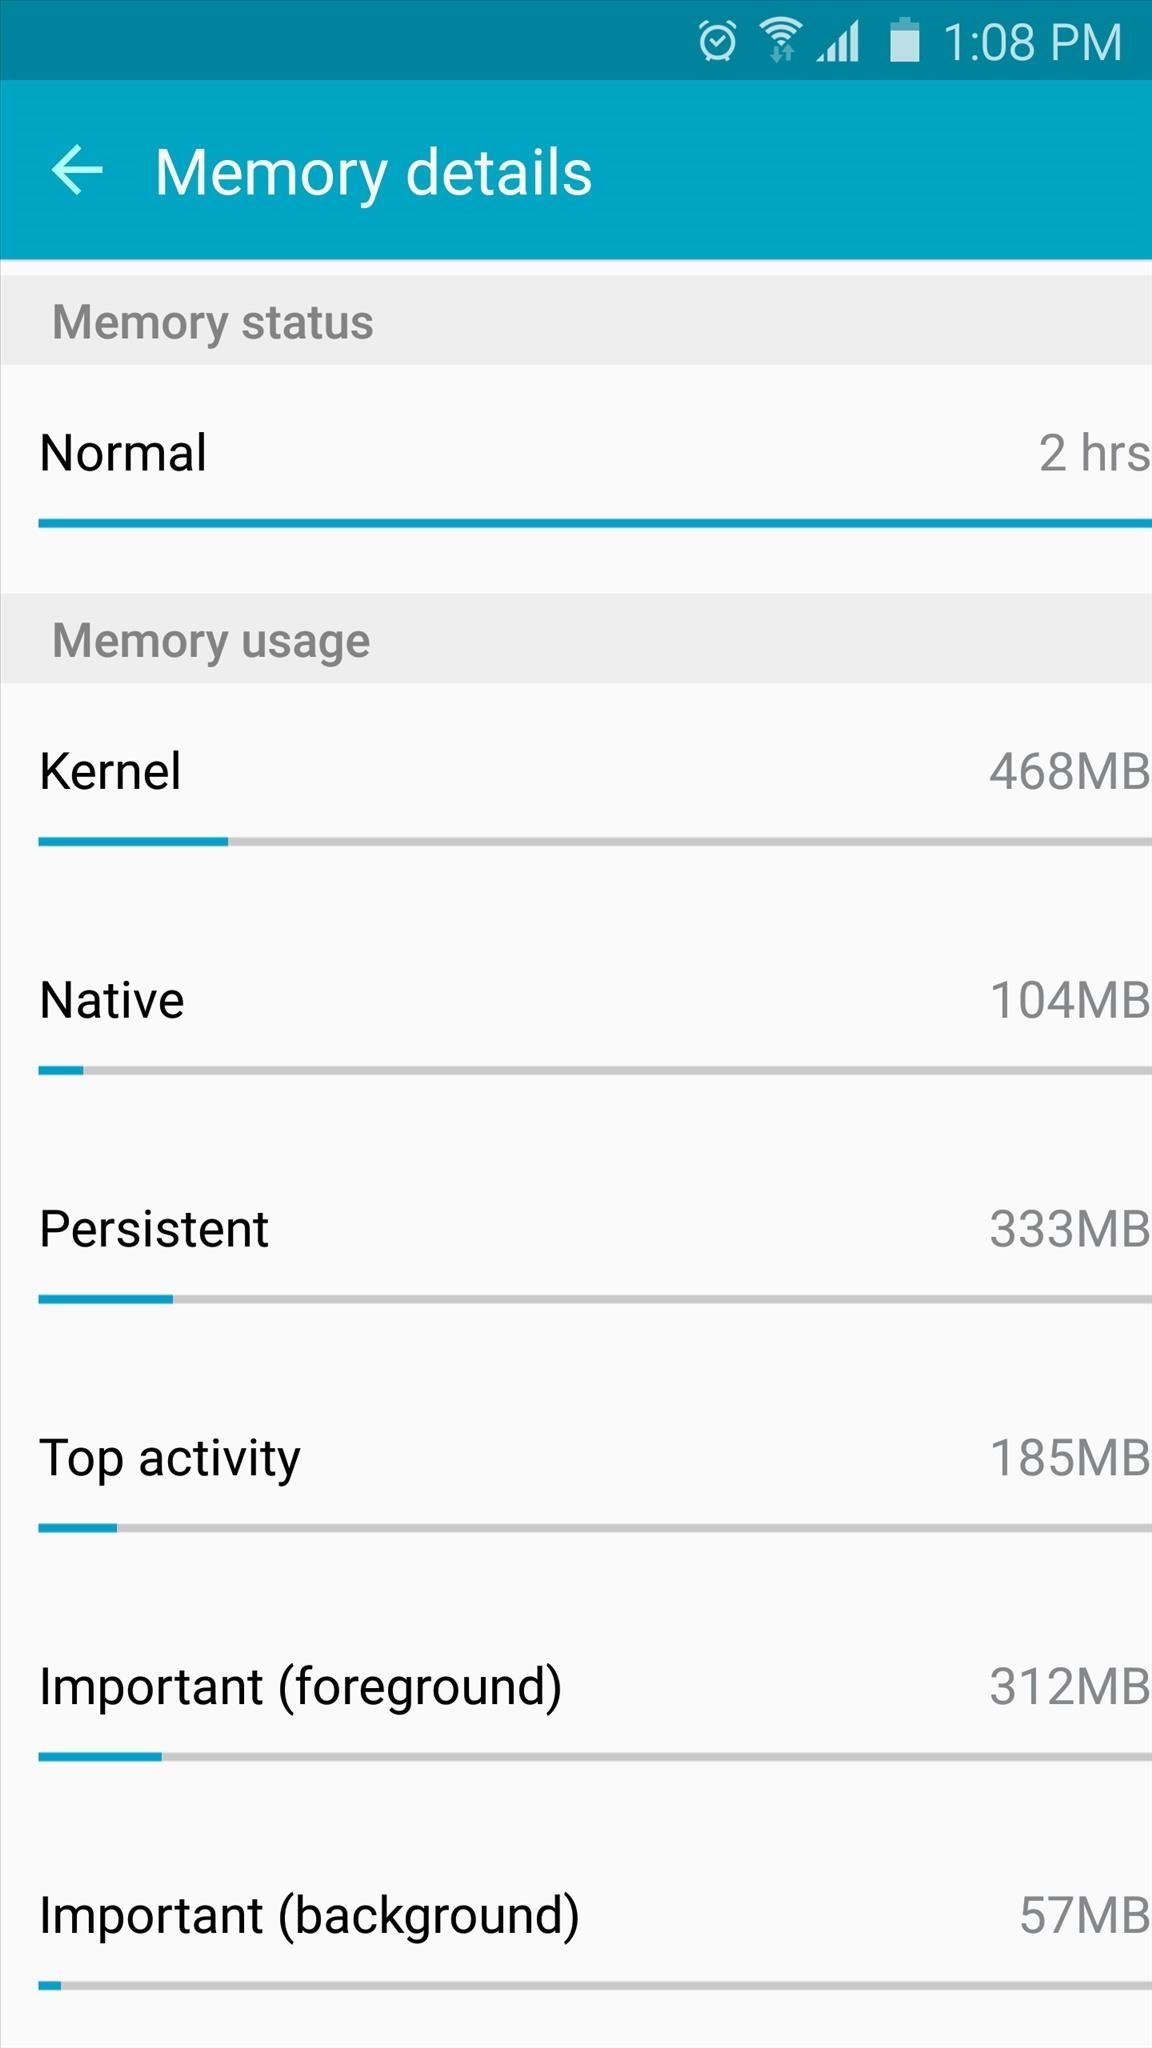
1: Process Stats
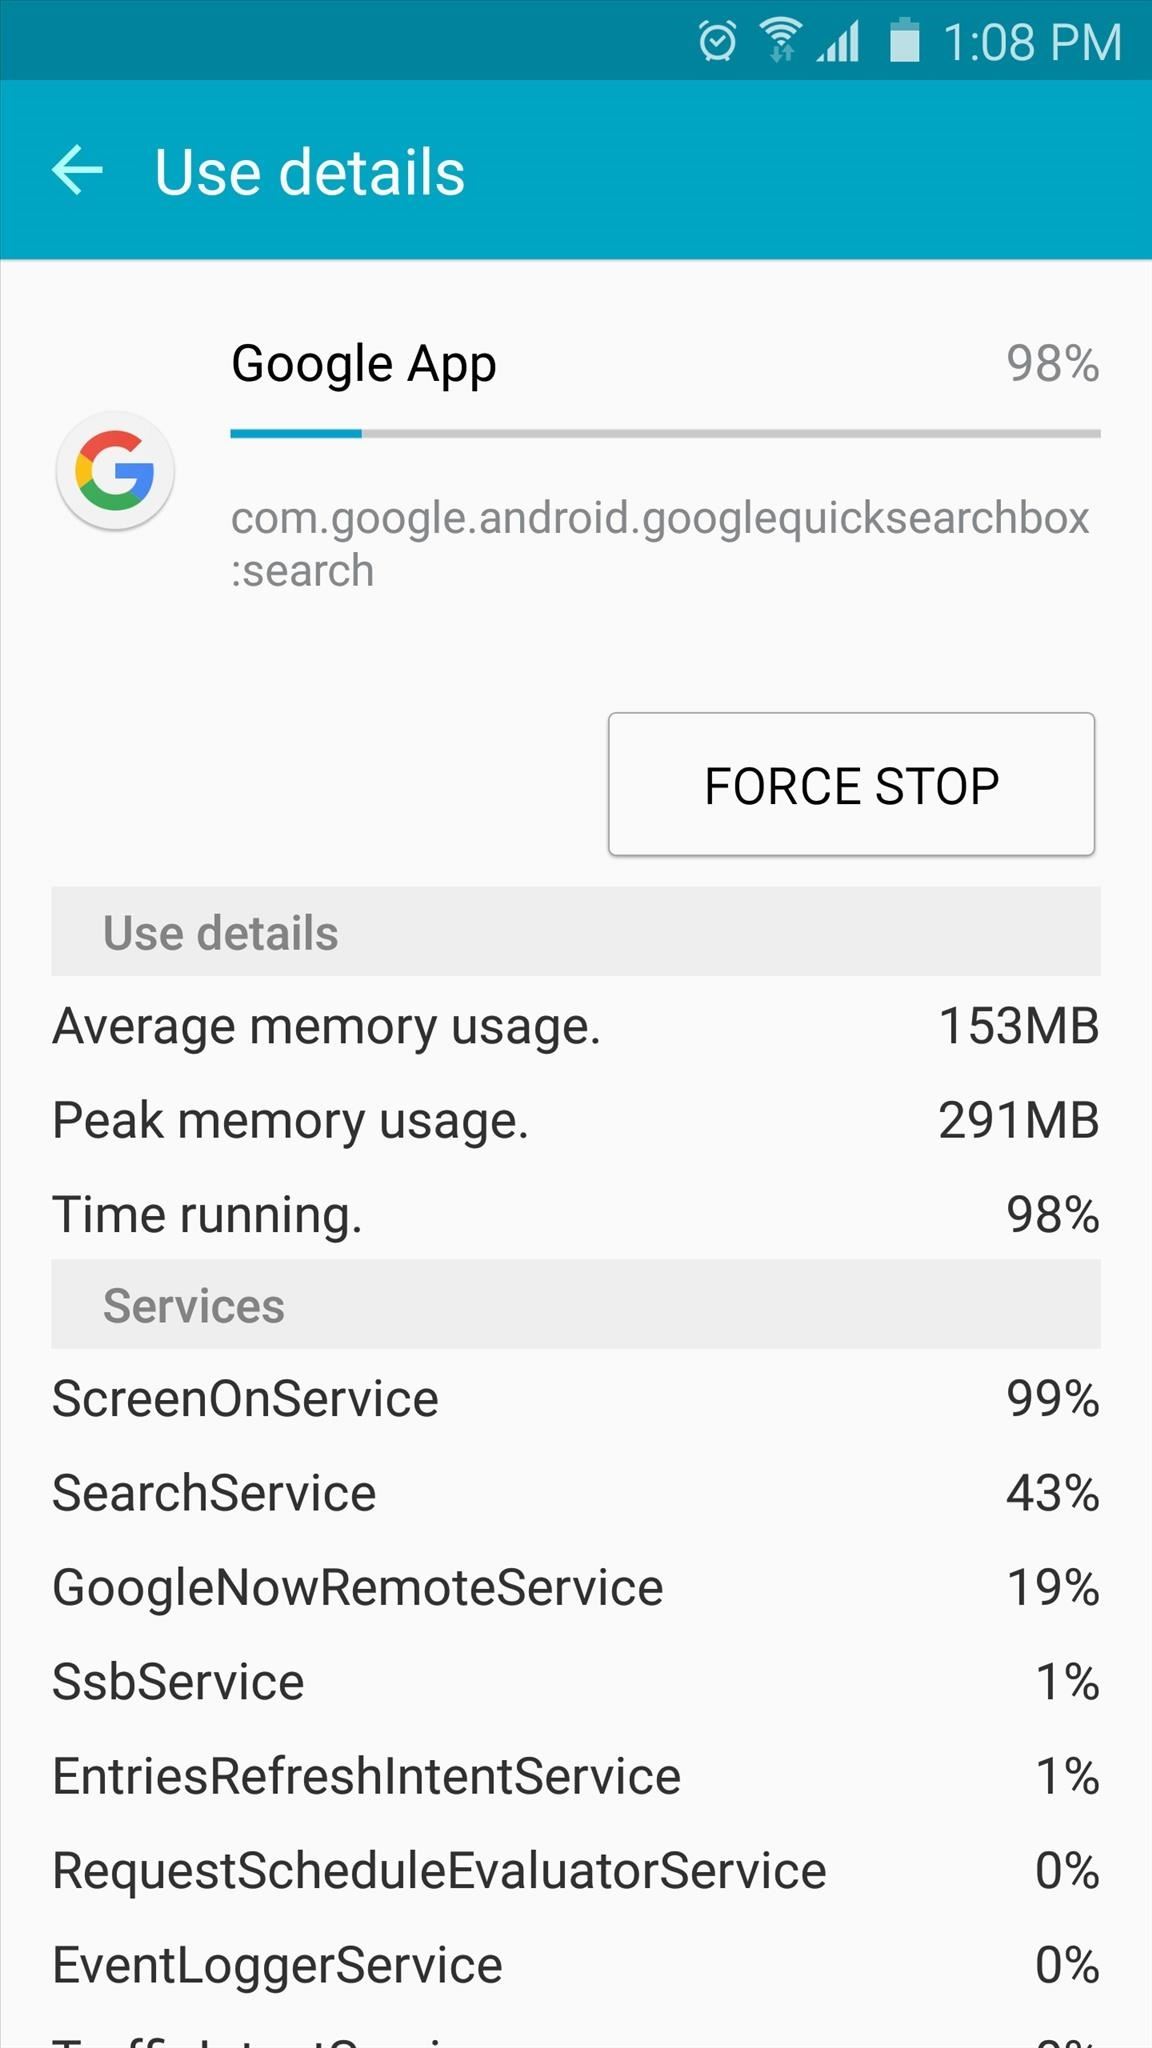
The first interesting Developer options entry we have for you is called "Process stats." When you tap this one, you'll see an interface that's very similar to Android's battery menu—except this one gives you details about your device's RAM memory usage. The bar graph at the top of the screen tells you what percentage of RAM is currently in use, and the app listings beneath it are ordered by how much memory each app is currently using.

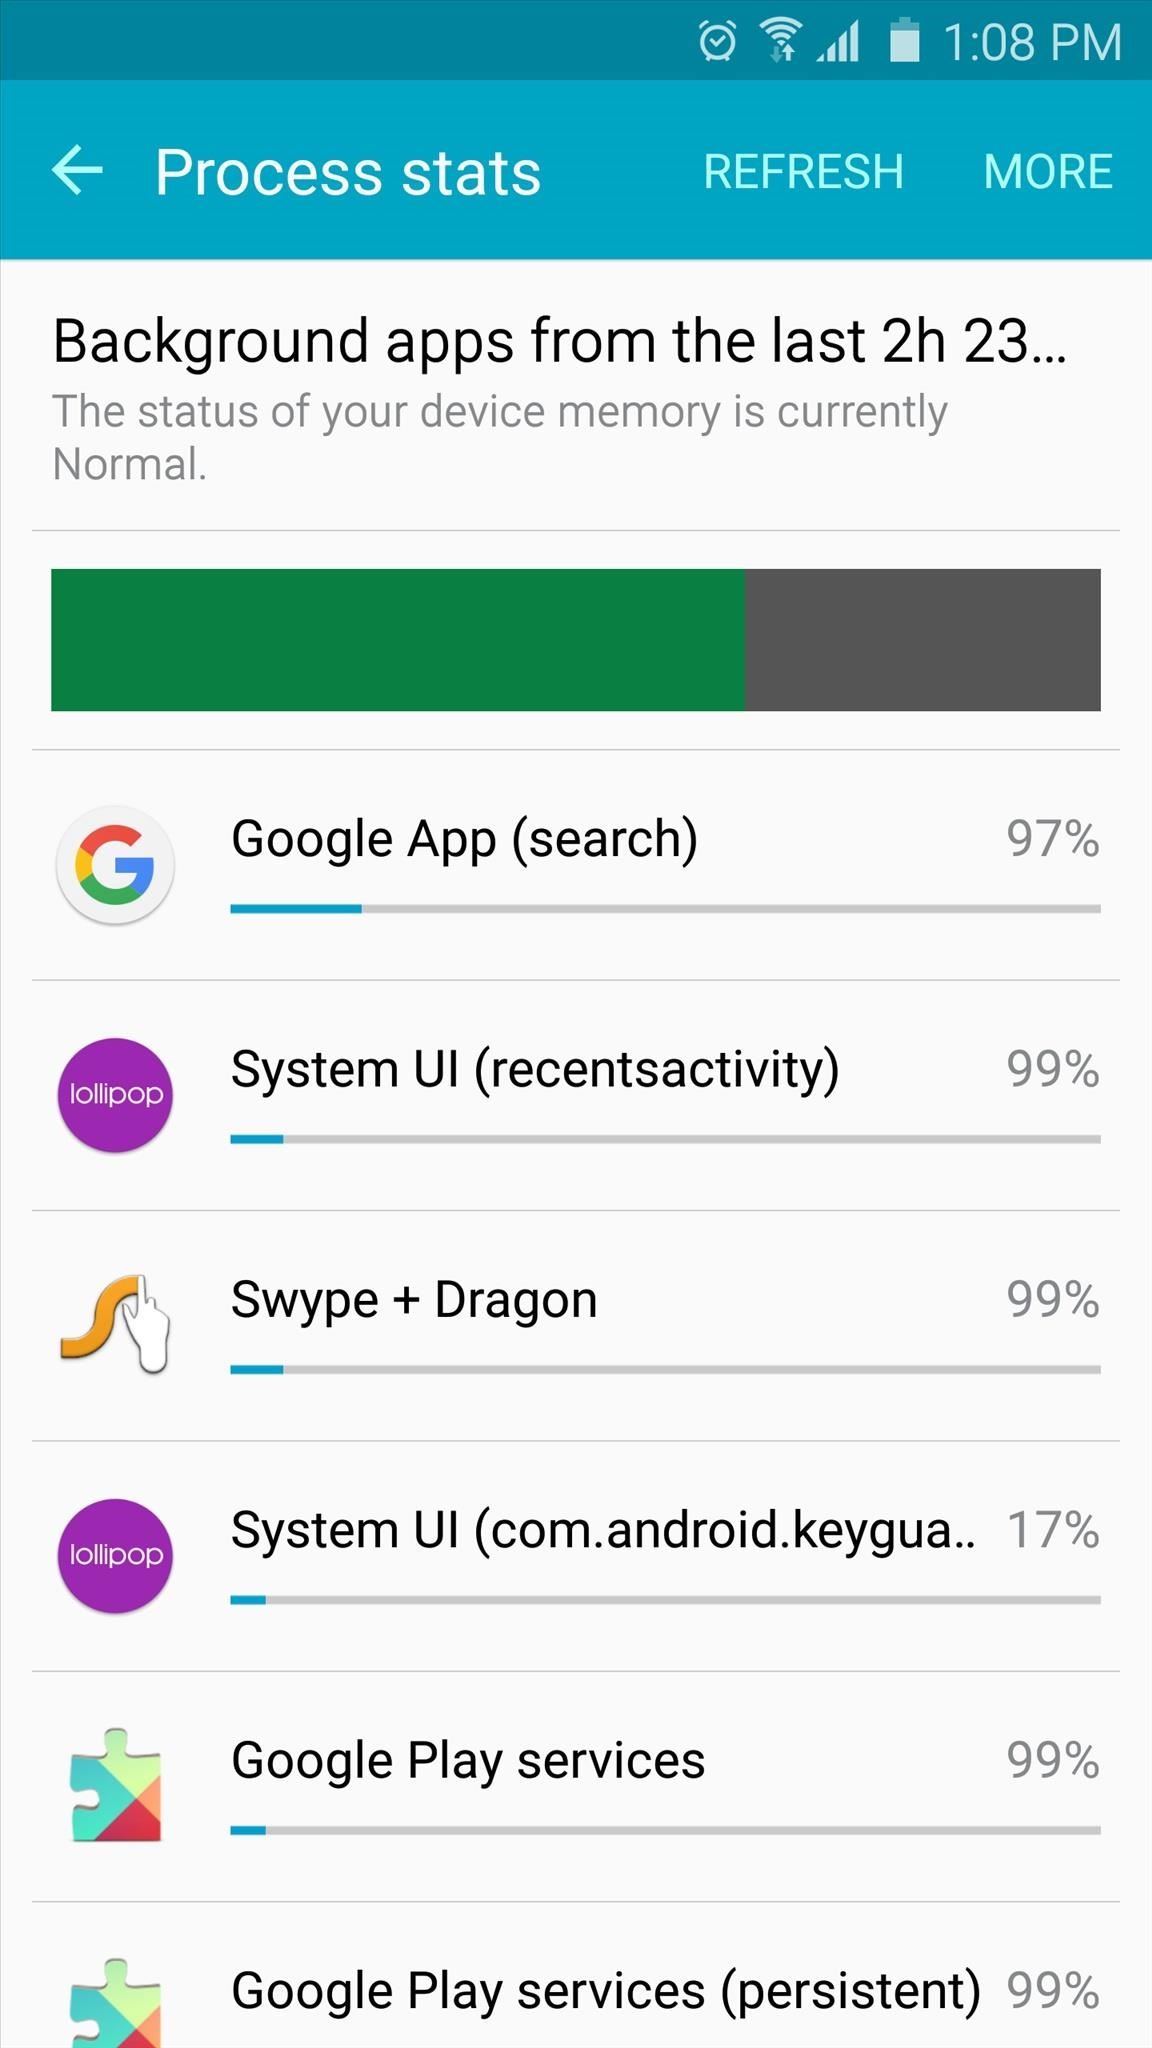
If you tap the bar graph, you'll see the amount of time your RAM usage has been reported as "Normal" or otherwise, and beneath that, you can see the types of processes that have been using your memory. On the other hand, if you tap an app listing from the main Process stats menu, you'll see details about the app's RAM usage, with a button that lets you easily force stop a RAM-hungry app.
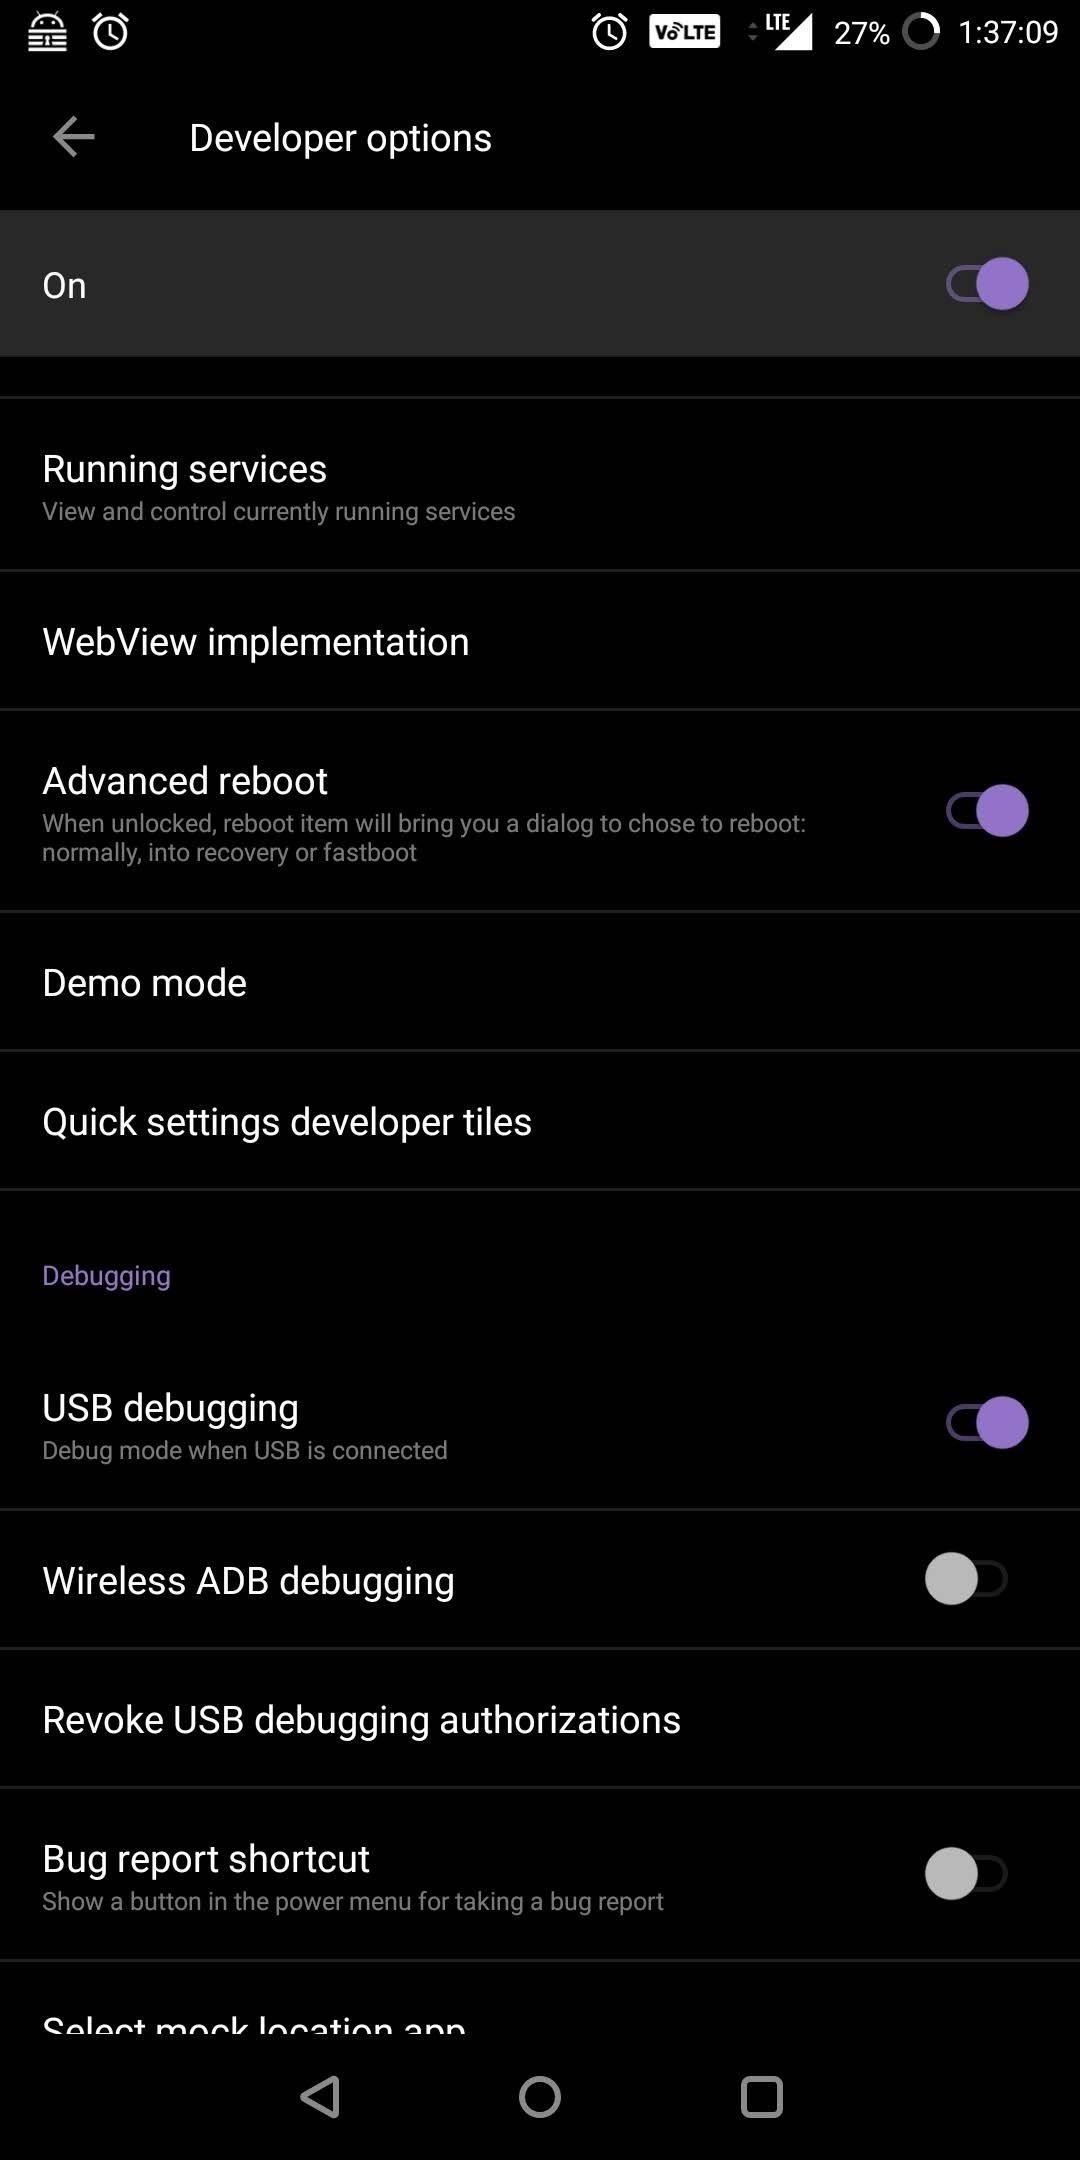
2: Advanced Reboot
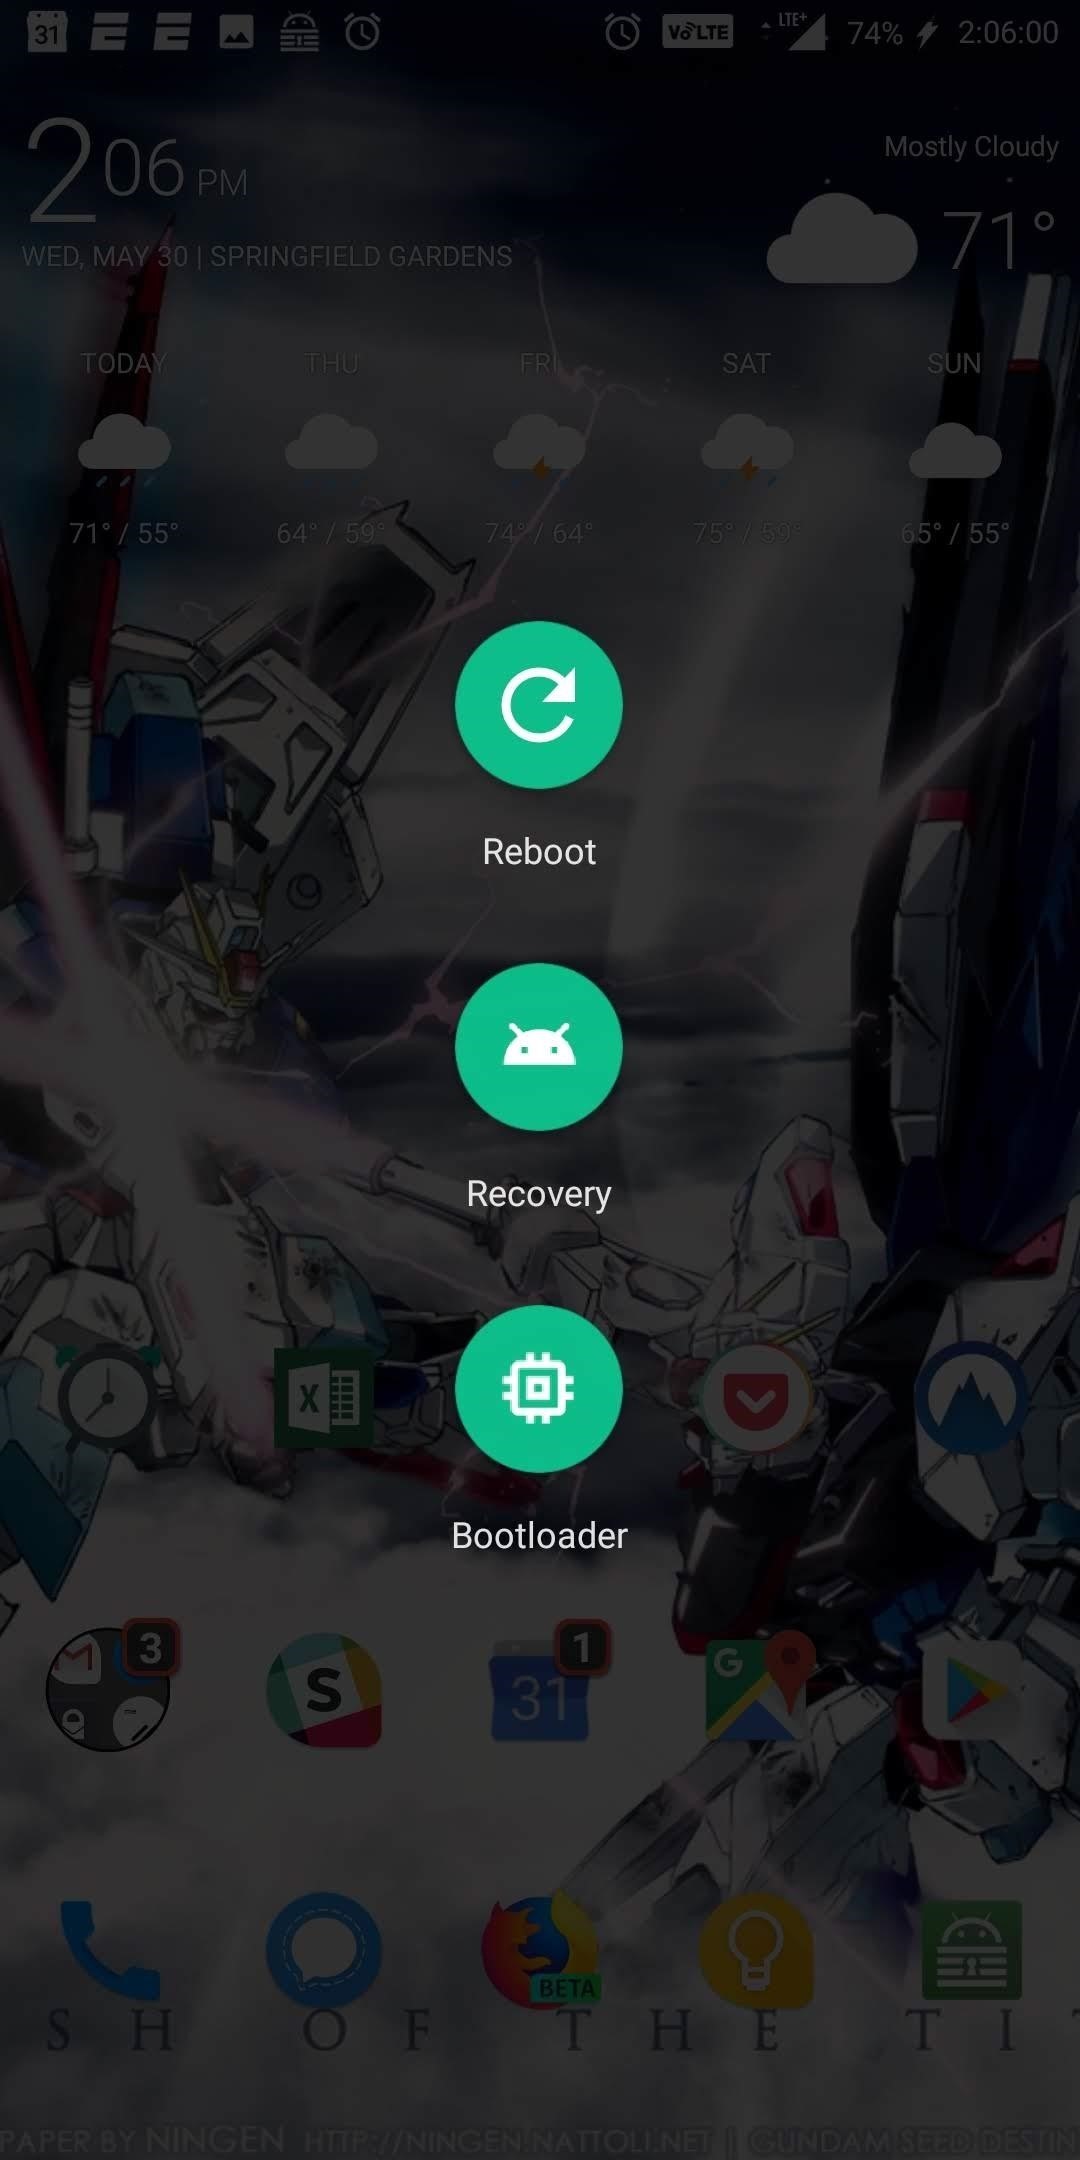
If you enable the "Advanced reboot" setting, your power menu is altered to include new options. Instead of typical Shutdown and Reboot options, when selecting Reboot, you'll see two new options: Recovery and Bootloader. By choosing either option, your device will reboot to the corresponding option.
With this feature, no longer do you need to hold various button combinations or use ADB commands to enter these recovery mode or the bootloader menu. Do note that many OEM disable this option, so you might not have access, depending on your device.
3: Mock Locations
There are some apps in the Play Store which spoof your location and trick other apps into thinking you're in a different place. However, to enable their functionality, you must first unlock Developer options.
Under the option "Select mock location app," choose the app that has location spoofing abilities. Once selected, you will now be able to use the app to change location, whether that in the town next door or another country.

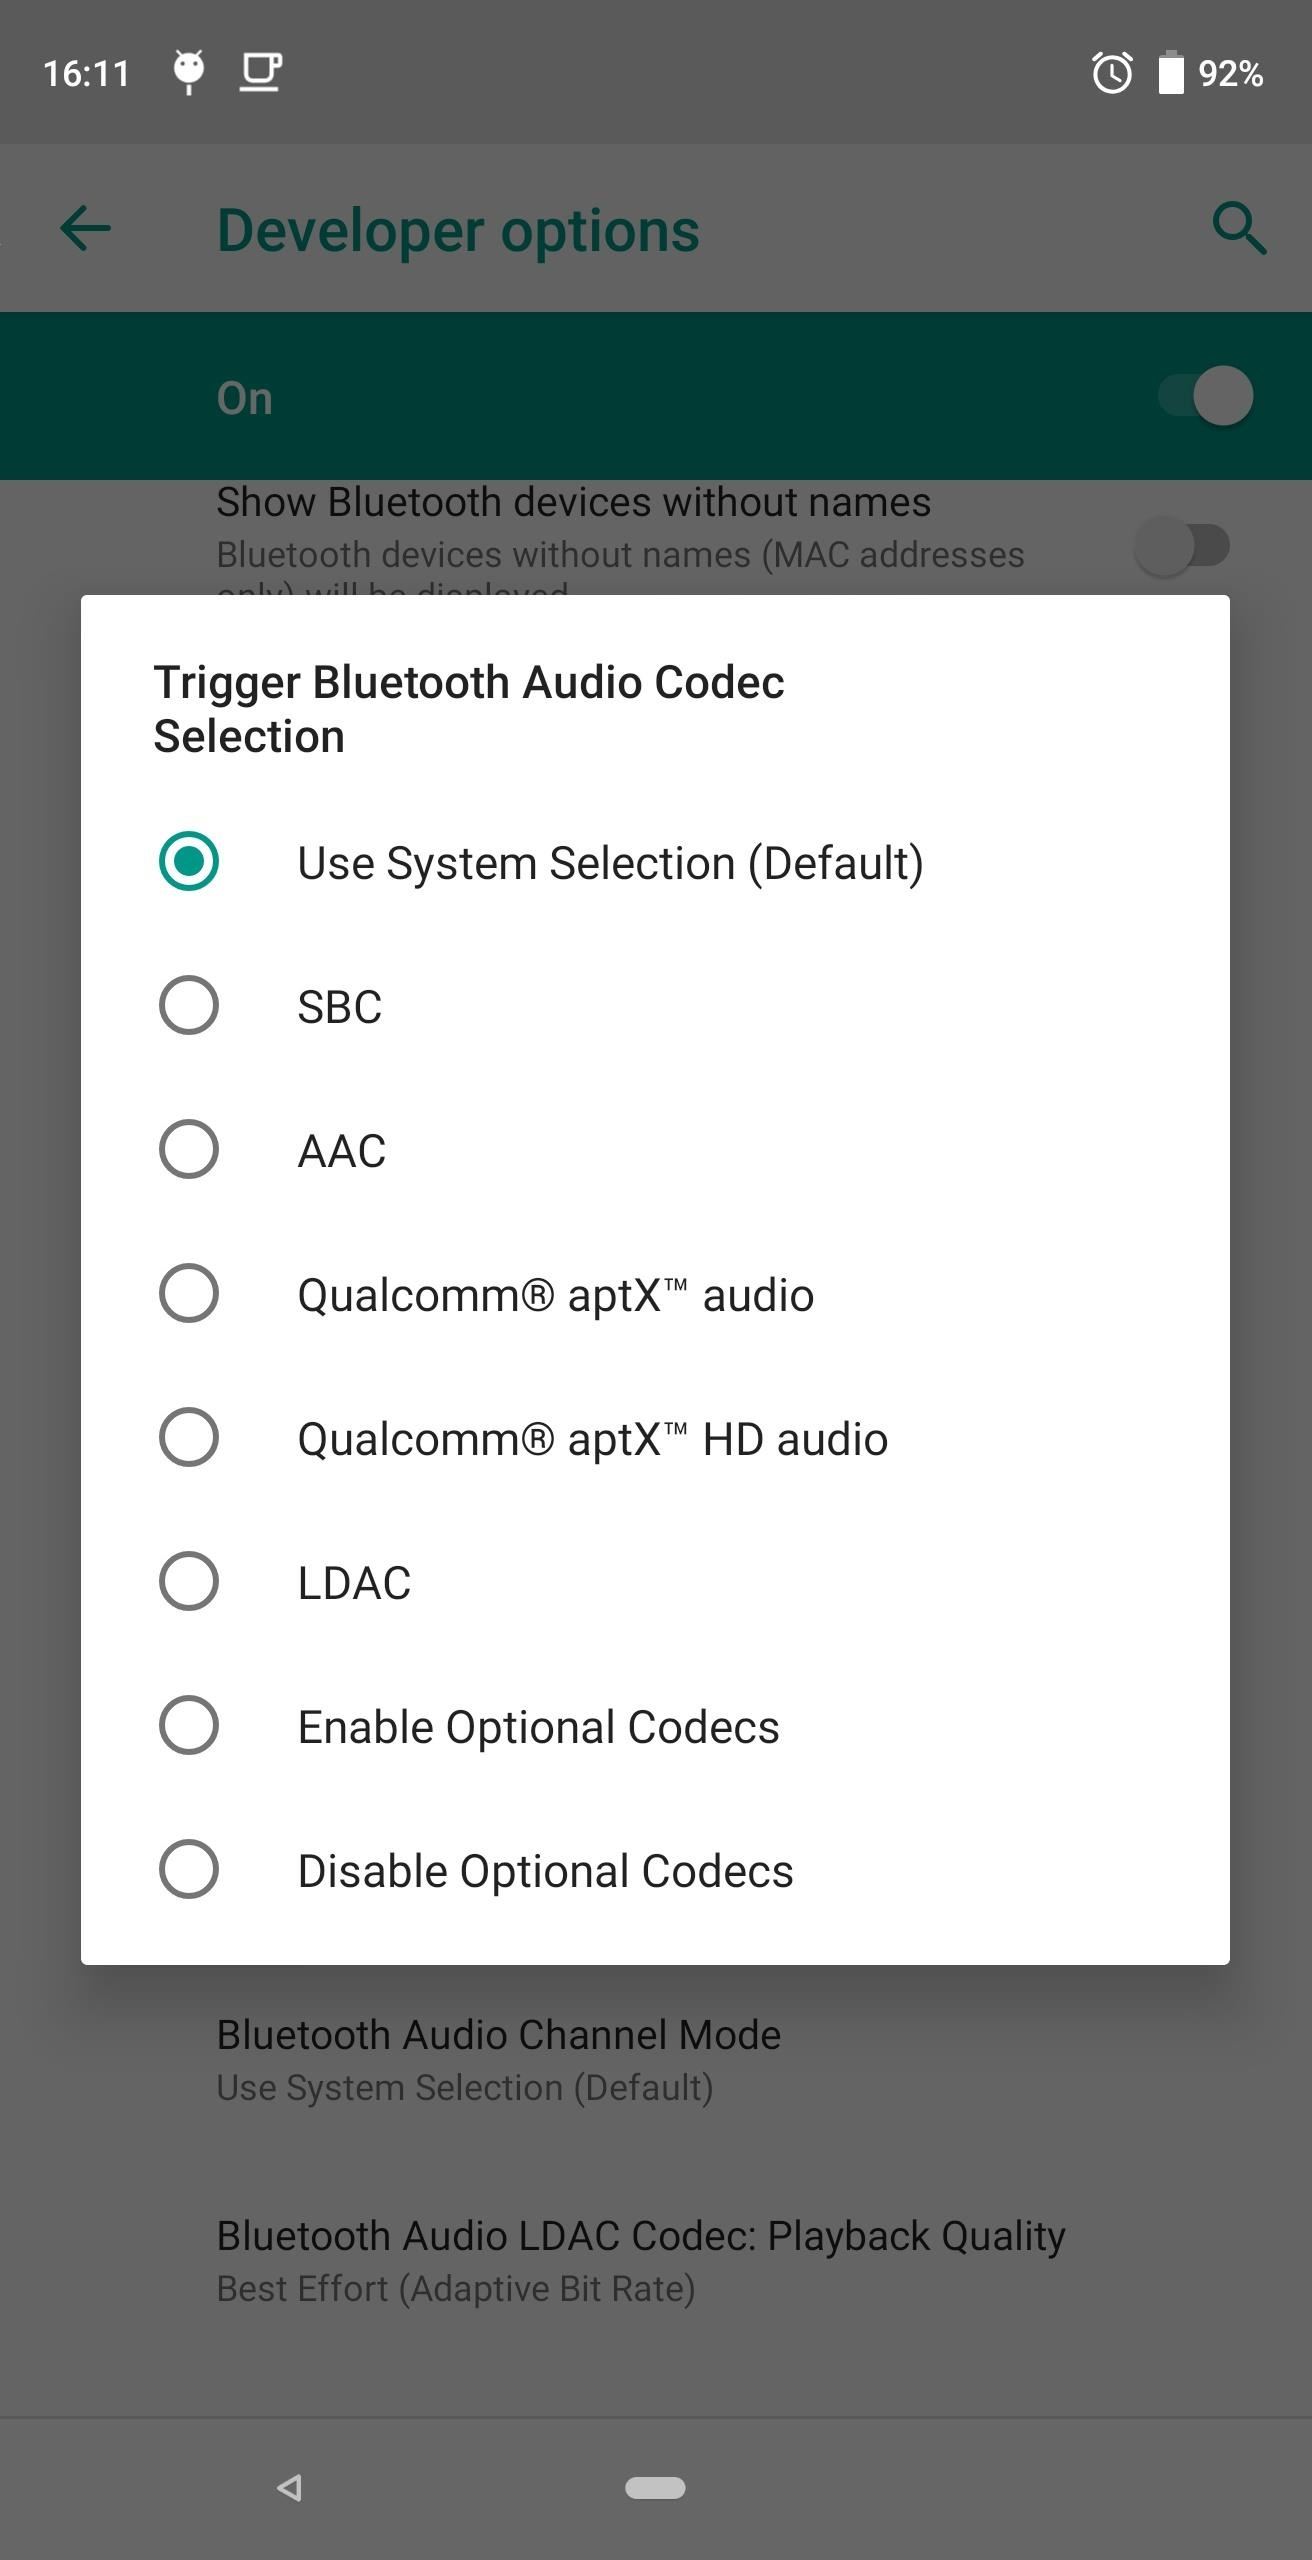
4: Hi-Fi Codecs
In Android Oreo, Google added support for Hi-Fi audio codecs to the operating system. When using Bluetooth devices which support these codecs, your phone will automatically switch to the corresponding codecs to output the audio in better quality. However, what if you happen to have a device which supports multiple codecs?
In Developer options, you'll find the "Bluetooth Audio Codec" setting, which allows you to configure codec selection manually. By default, "Use System Selection" is enabled, which automatically selects a codec for you. However, you can change to any of the other audio codecs manually (including non-Hi-Fi choices) as long as the connected accessory supports it.

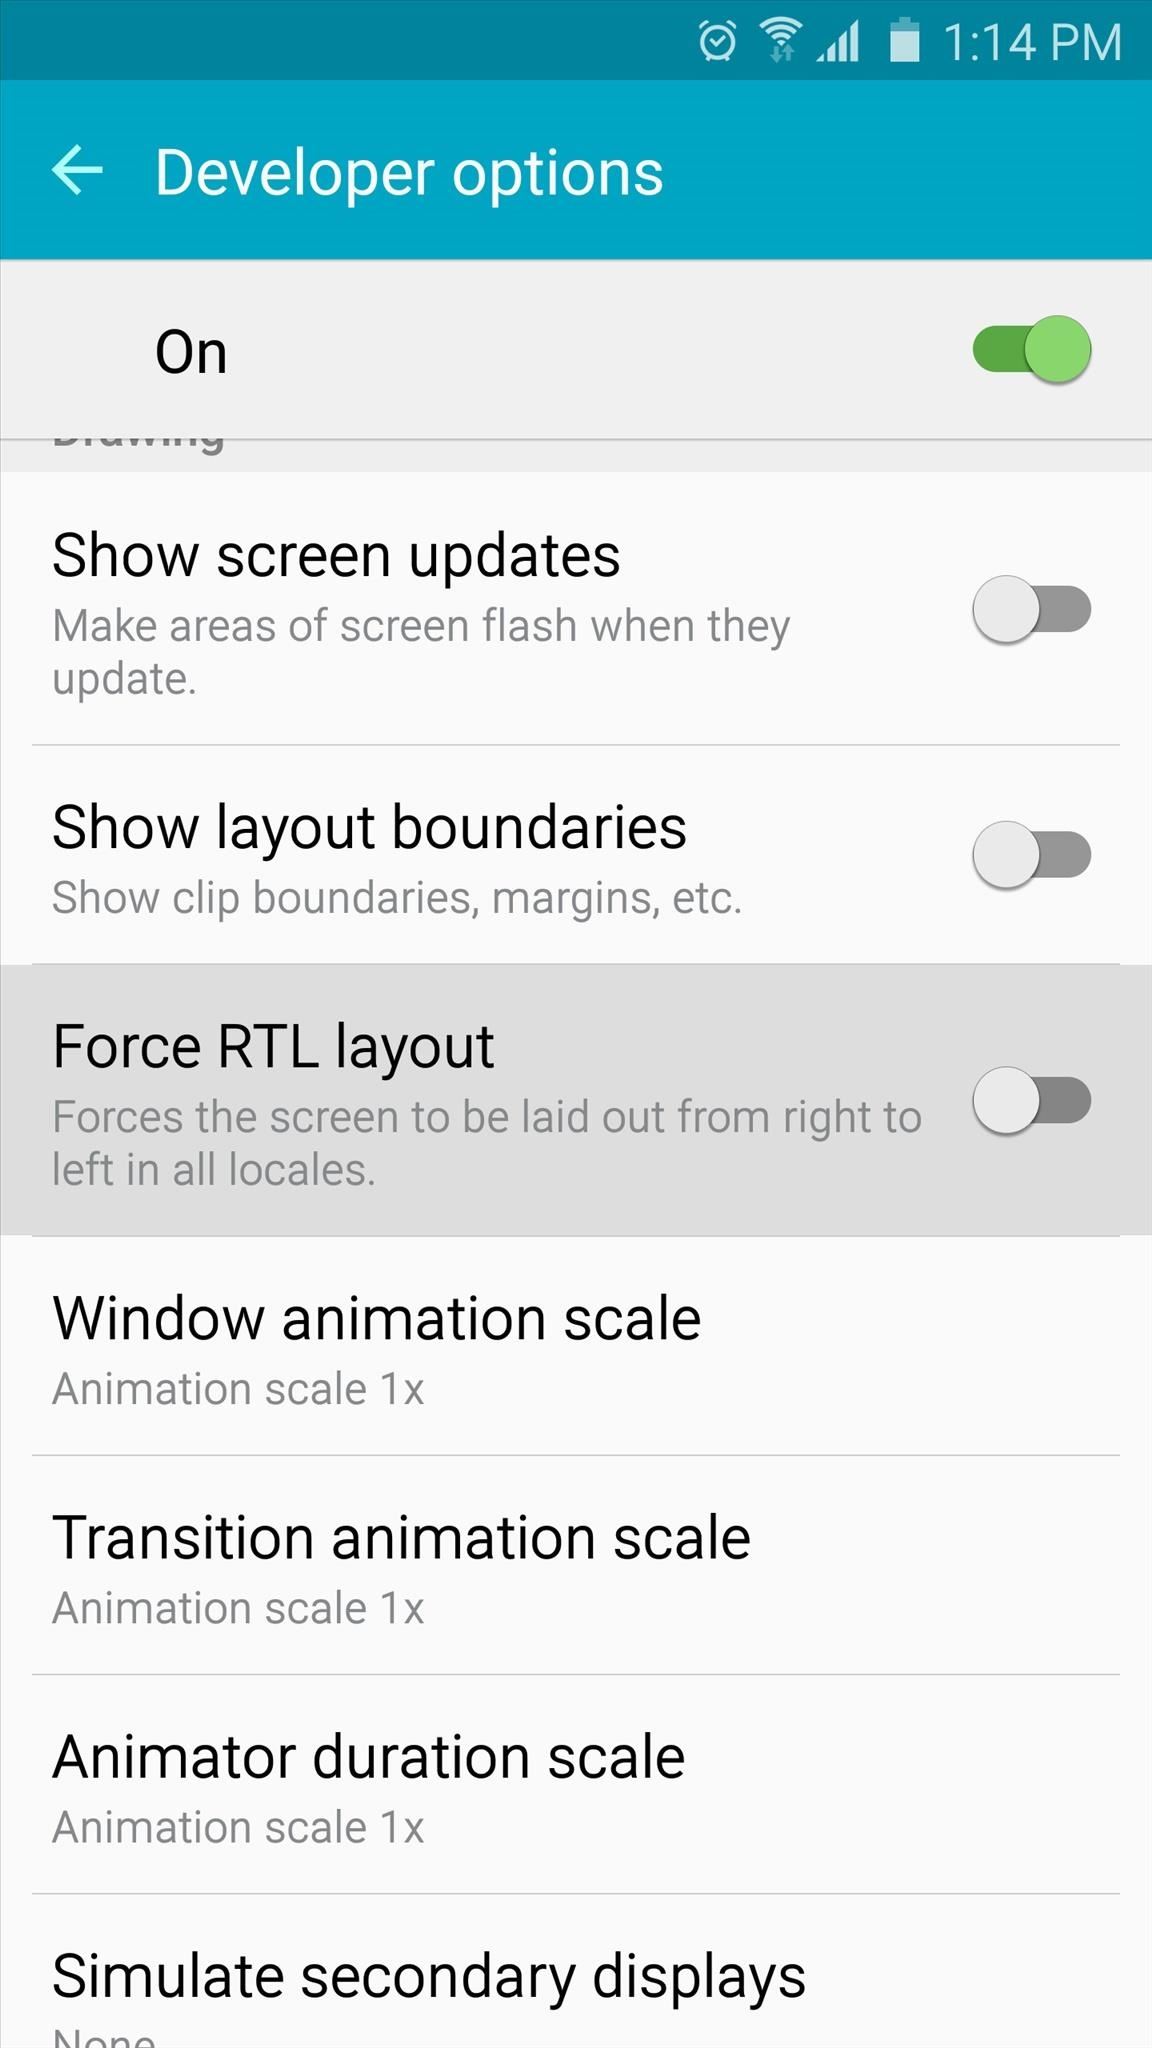
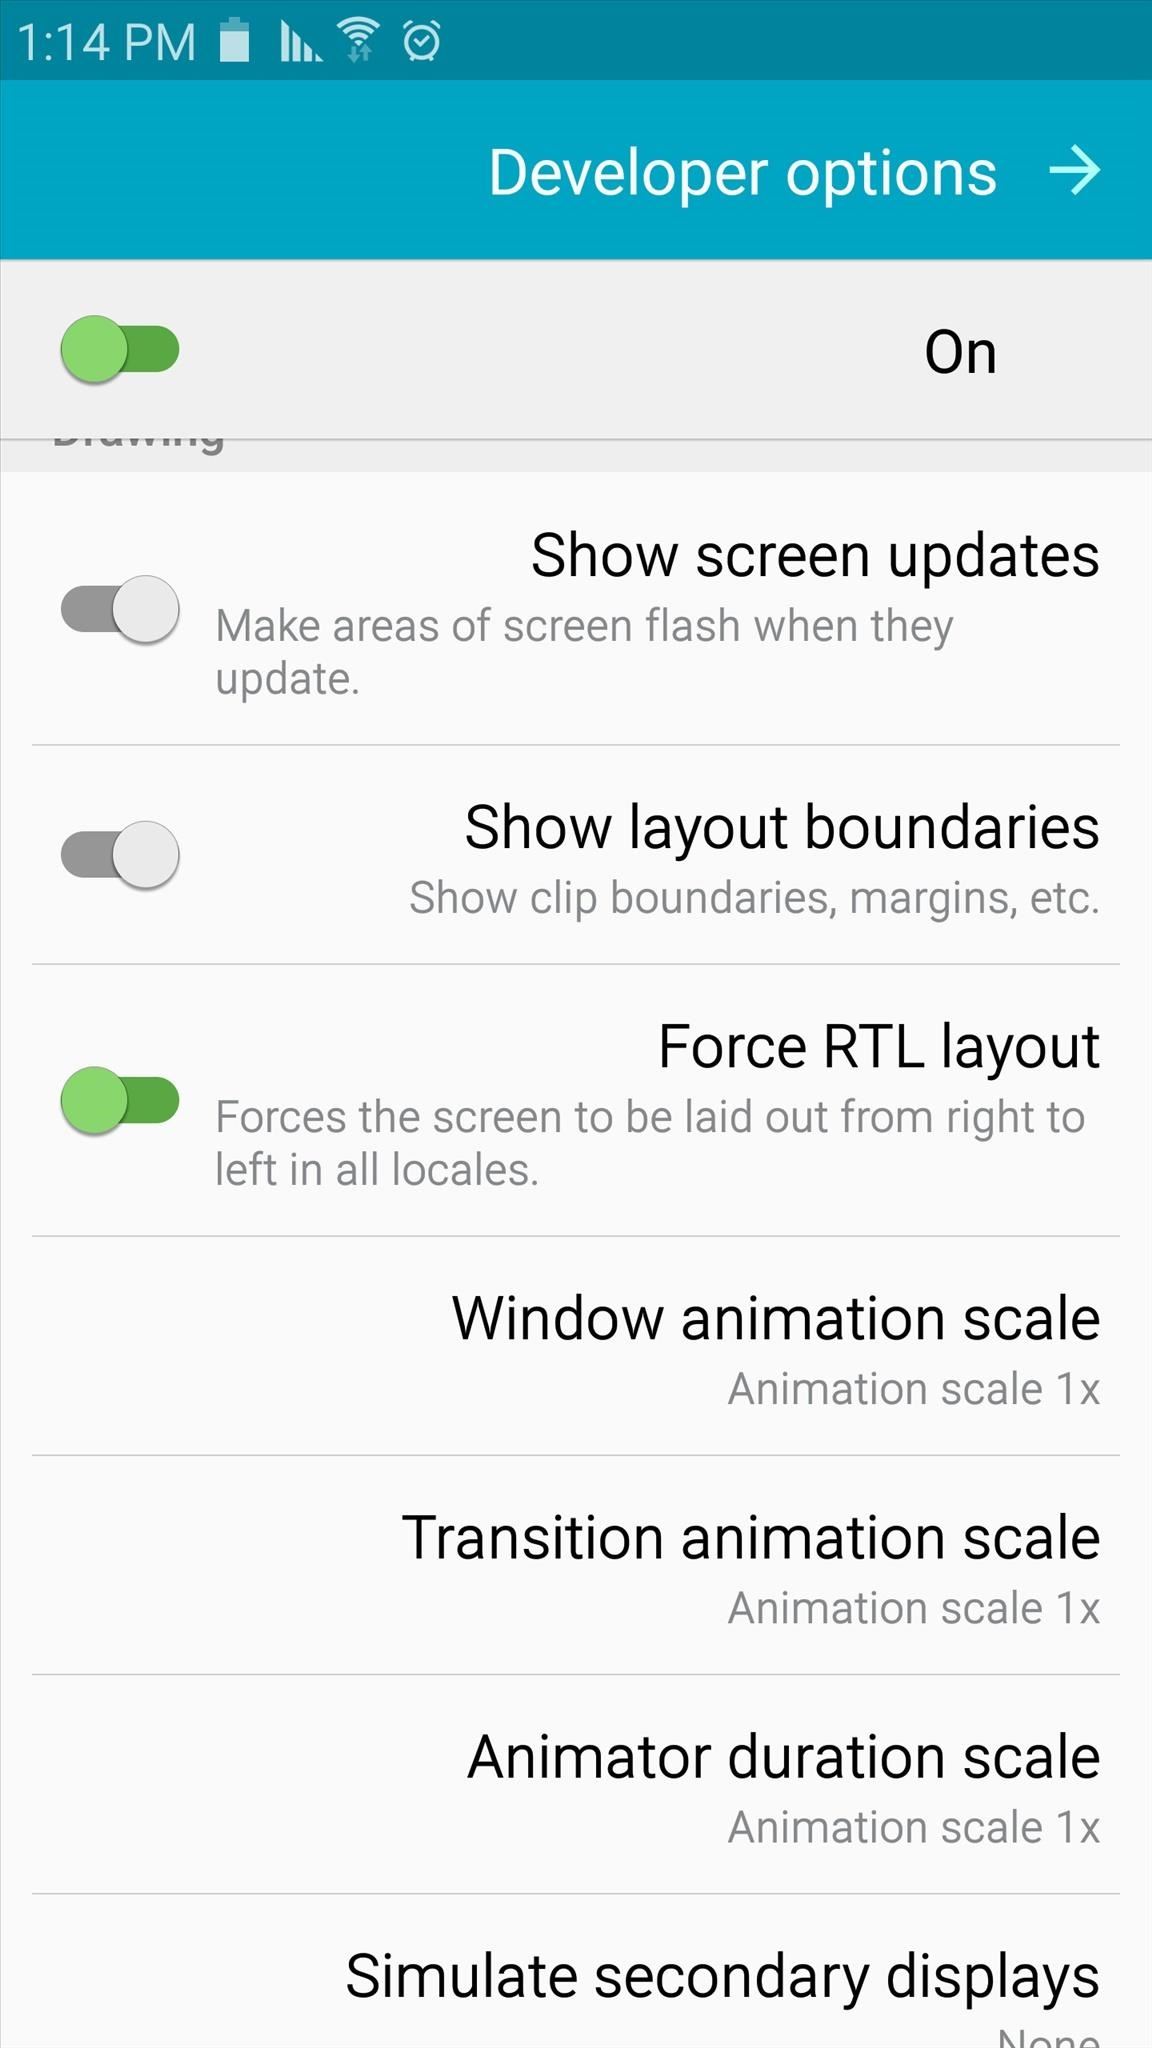
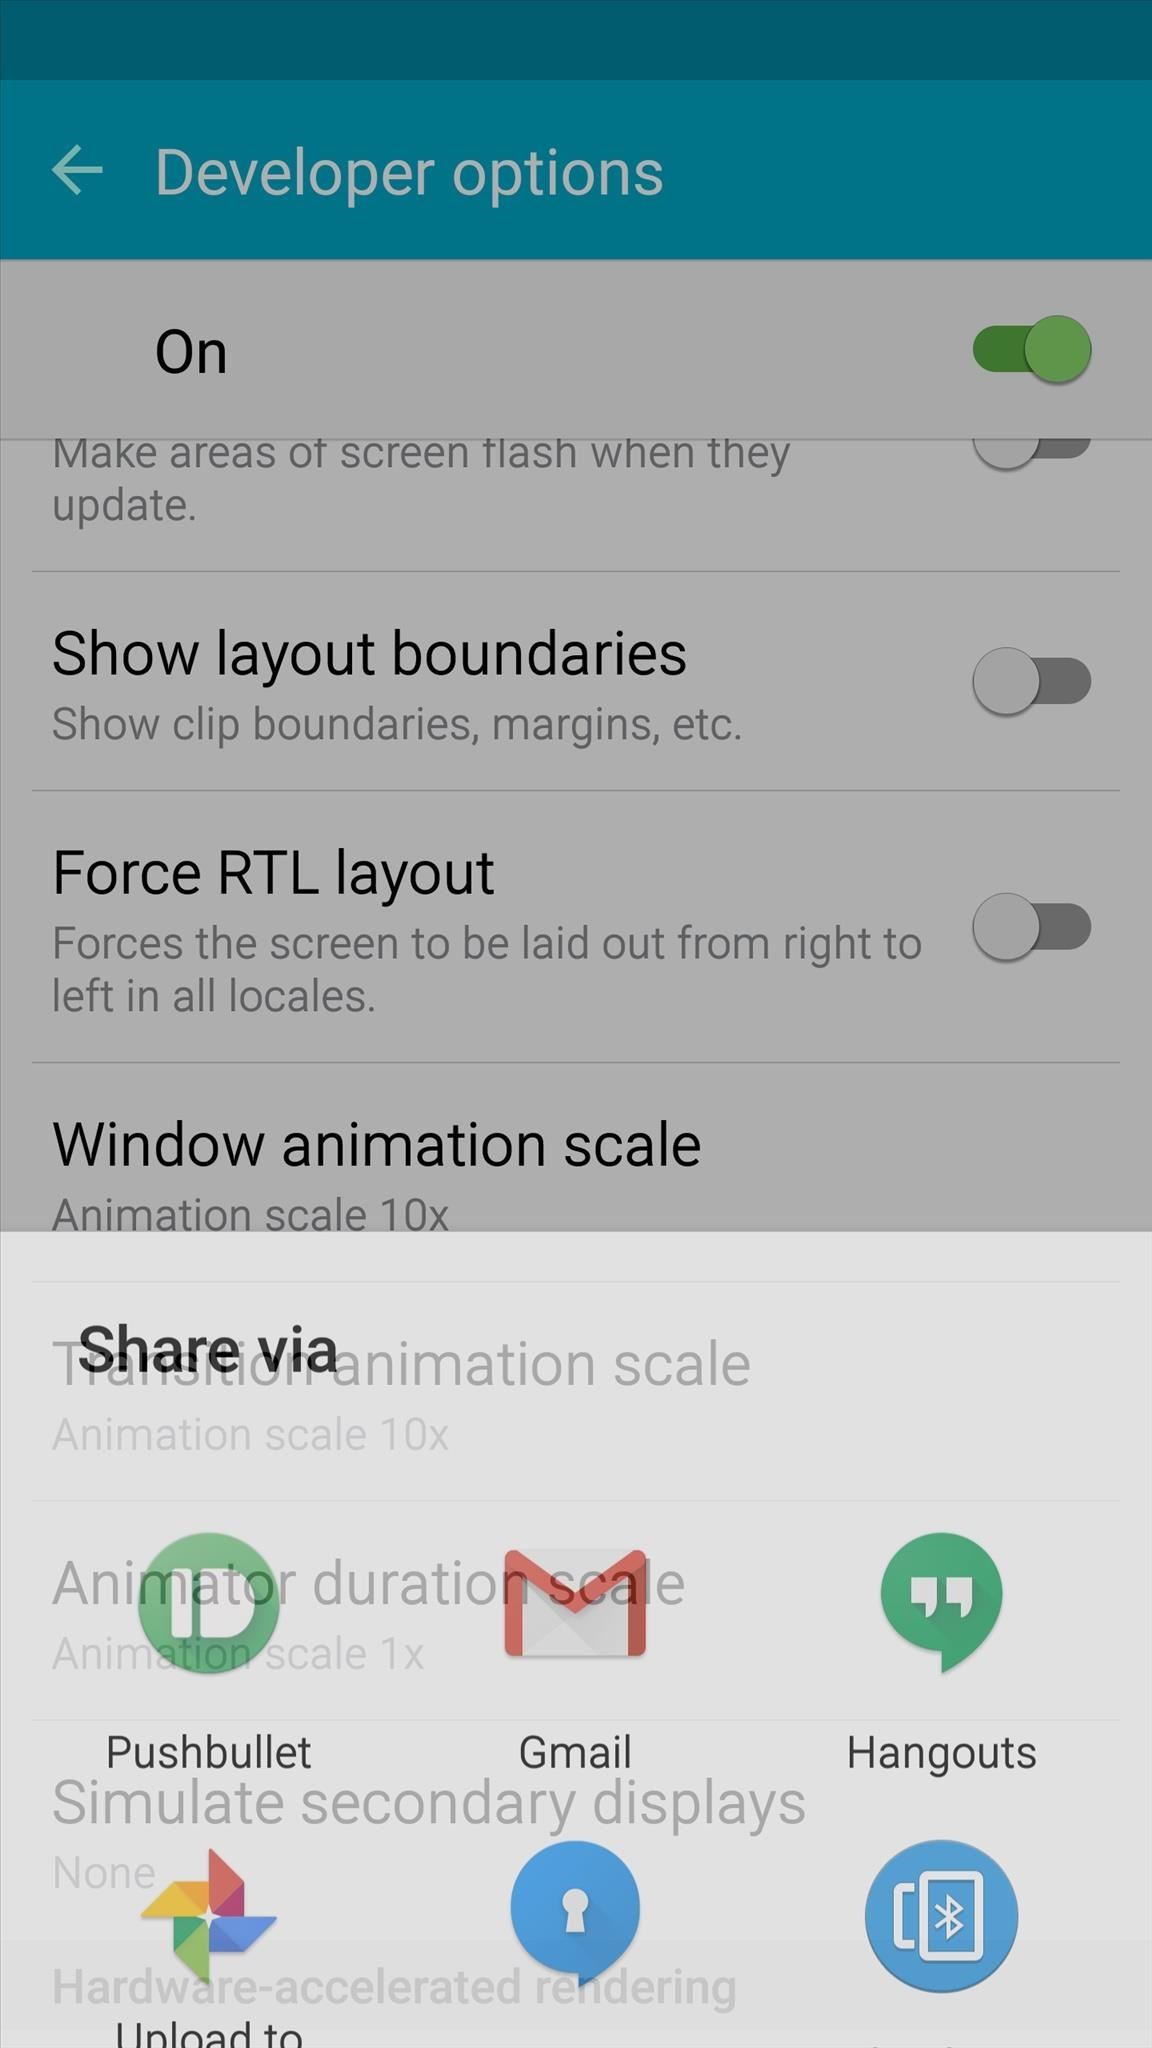
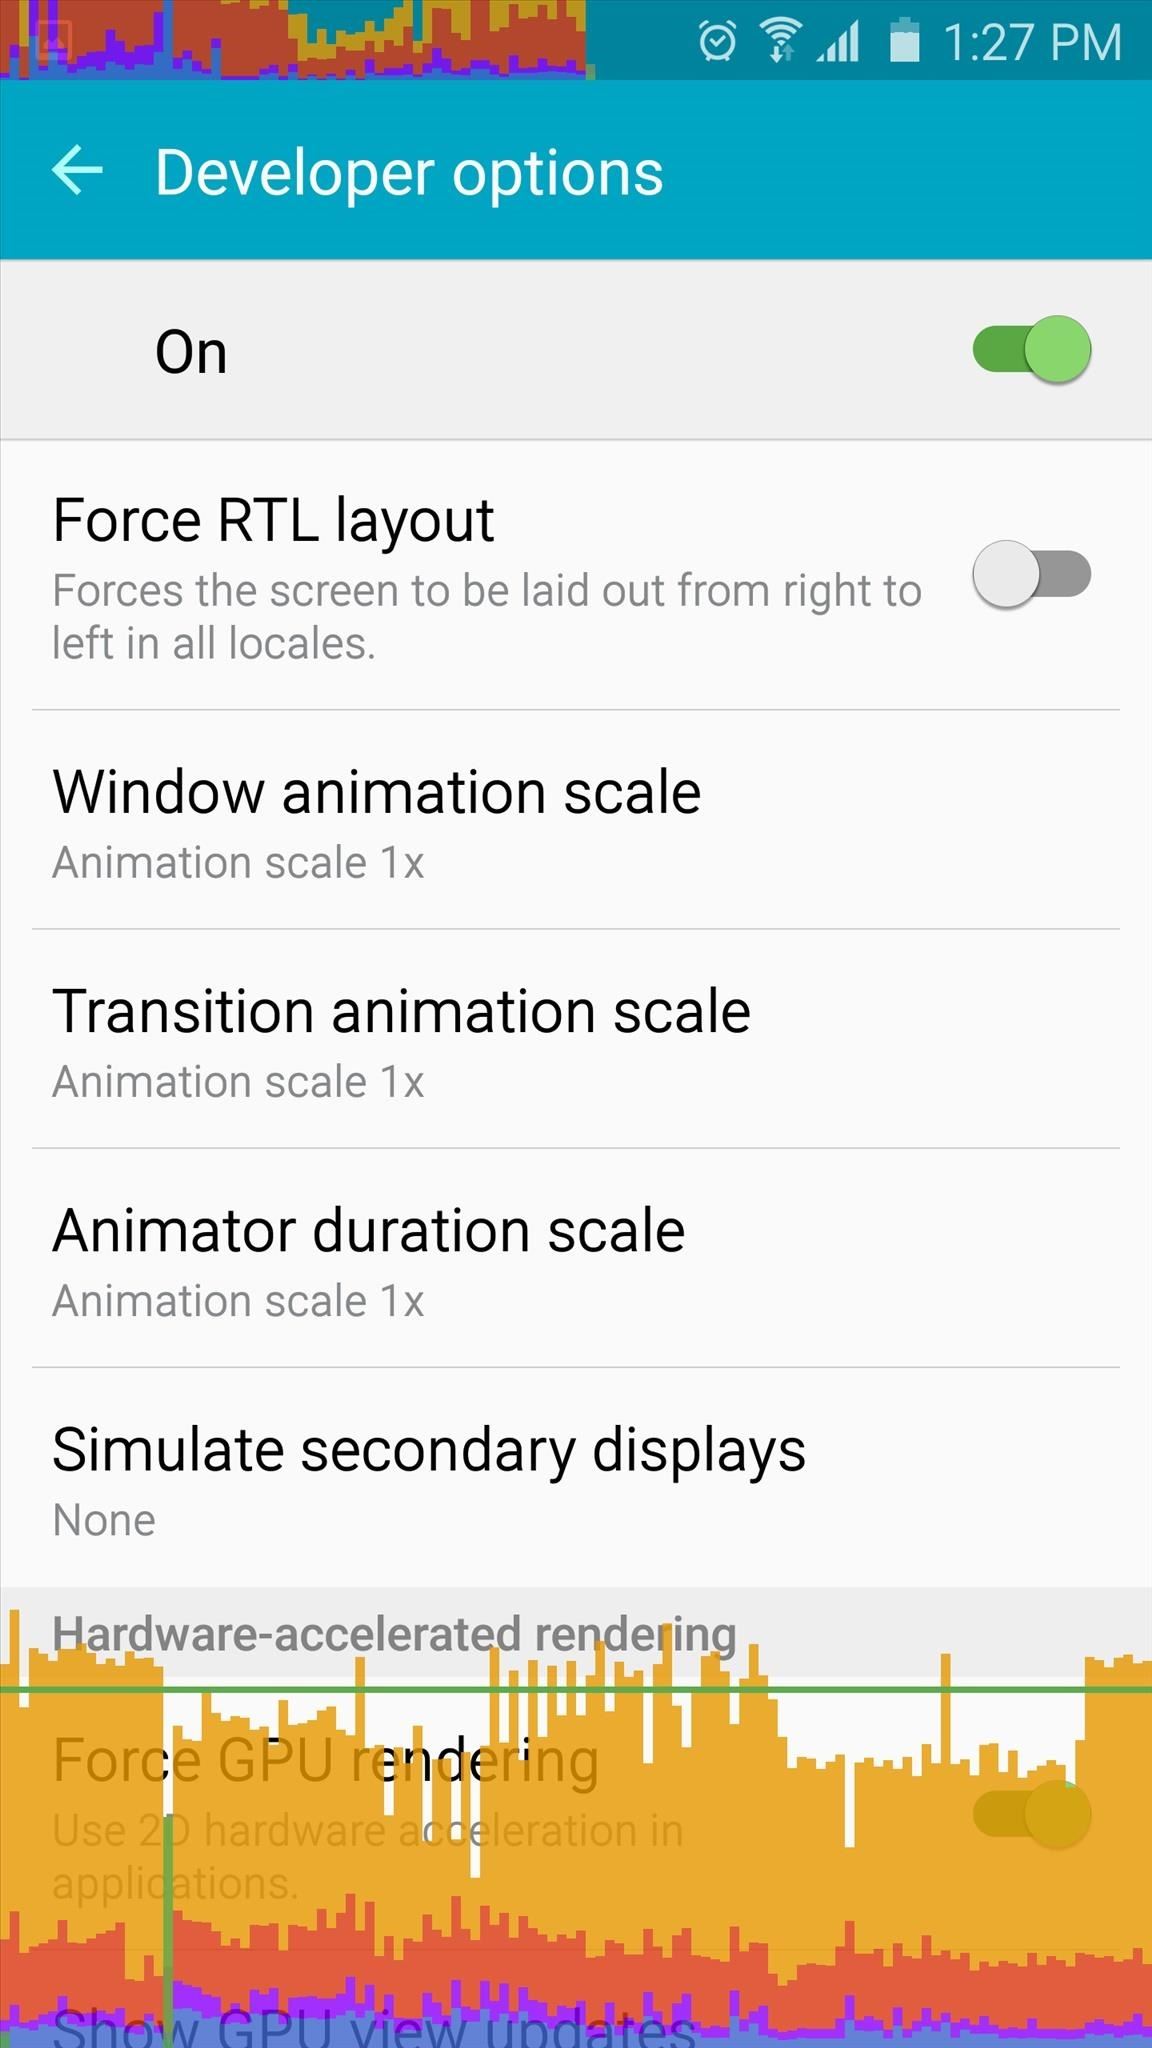
5: Force RTL Layout
This next cool Developer option is mostly just a fun way to experience your phone in a new layout—though if your system language is set to Arabic, Urdu, or Yiddish, for example, it can be quite helpful, as well as if you're left-handed.
Toggle the switch next to "Force RTL layout," and the orientation of almost all elements on your screen will switch over to an RTL, or right-to-left, layout. Text formatting will still be defined by your regular system language, so you can still read everything, but the formatting might be a better fit for certain languages.
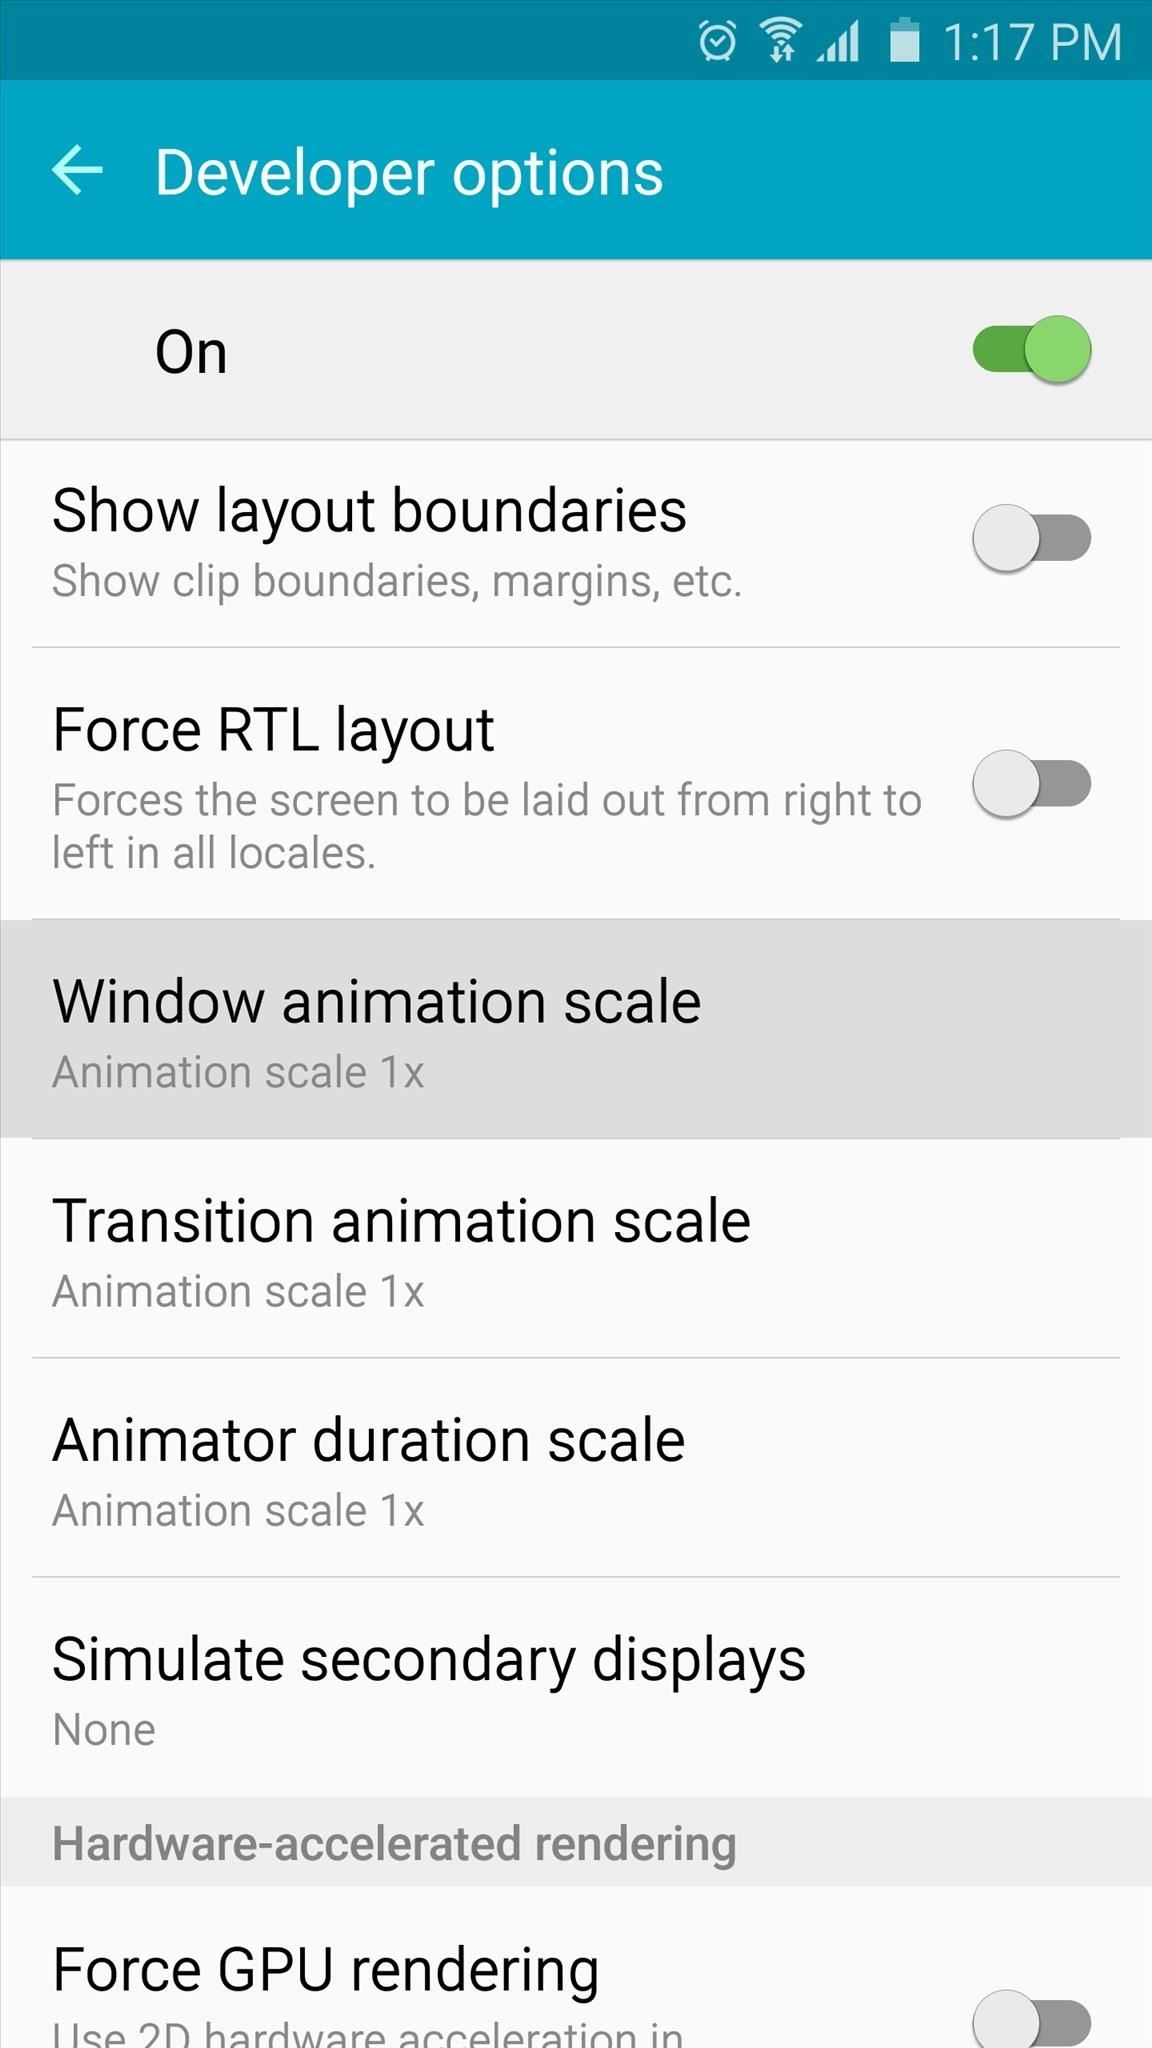
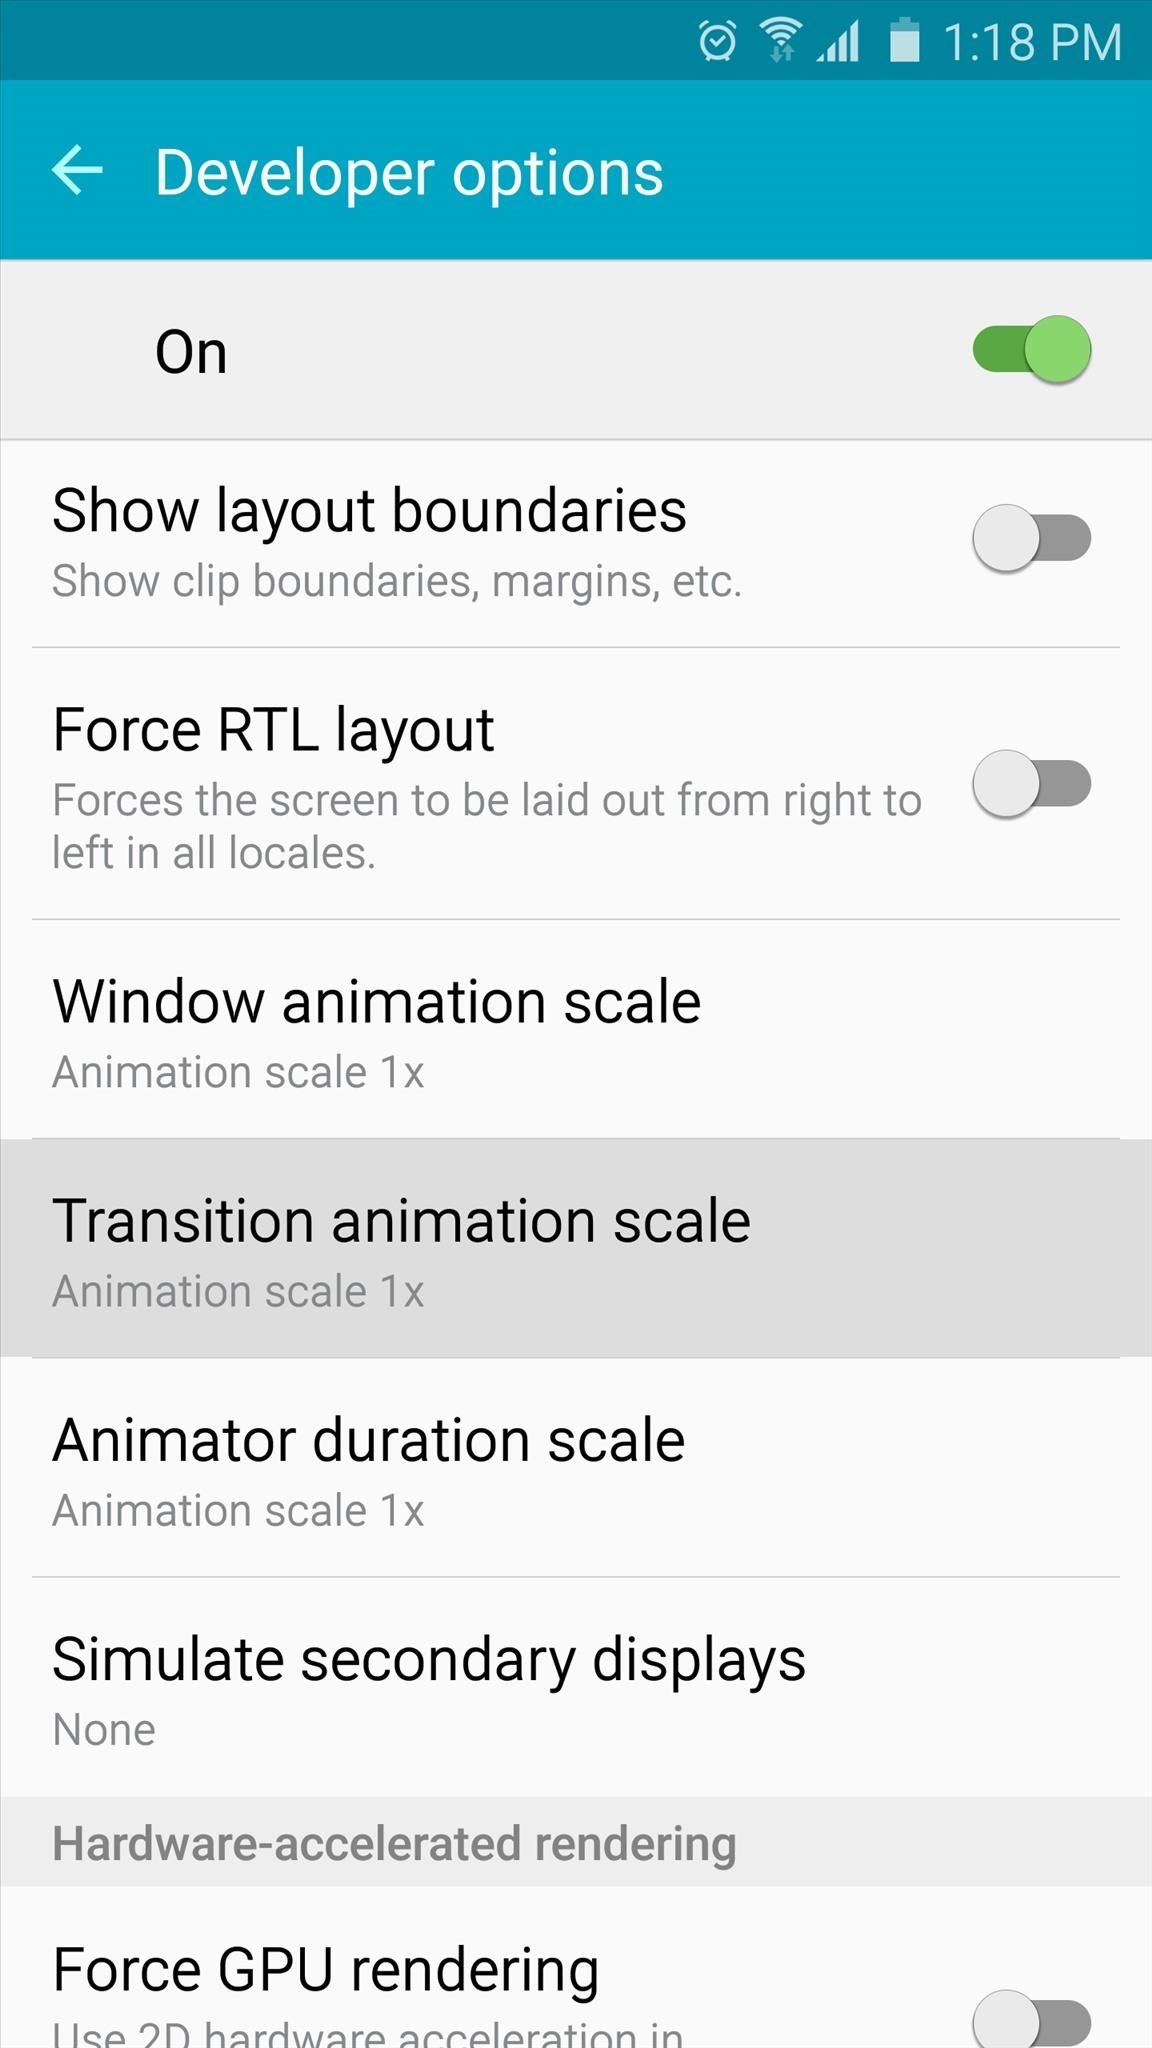
6: Window & Transition Animation Scale
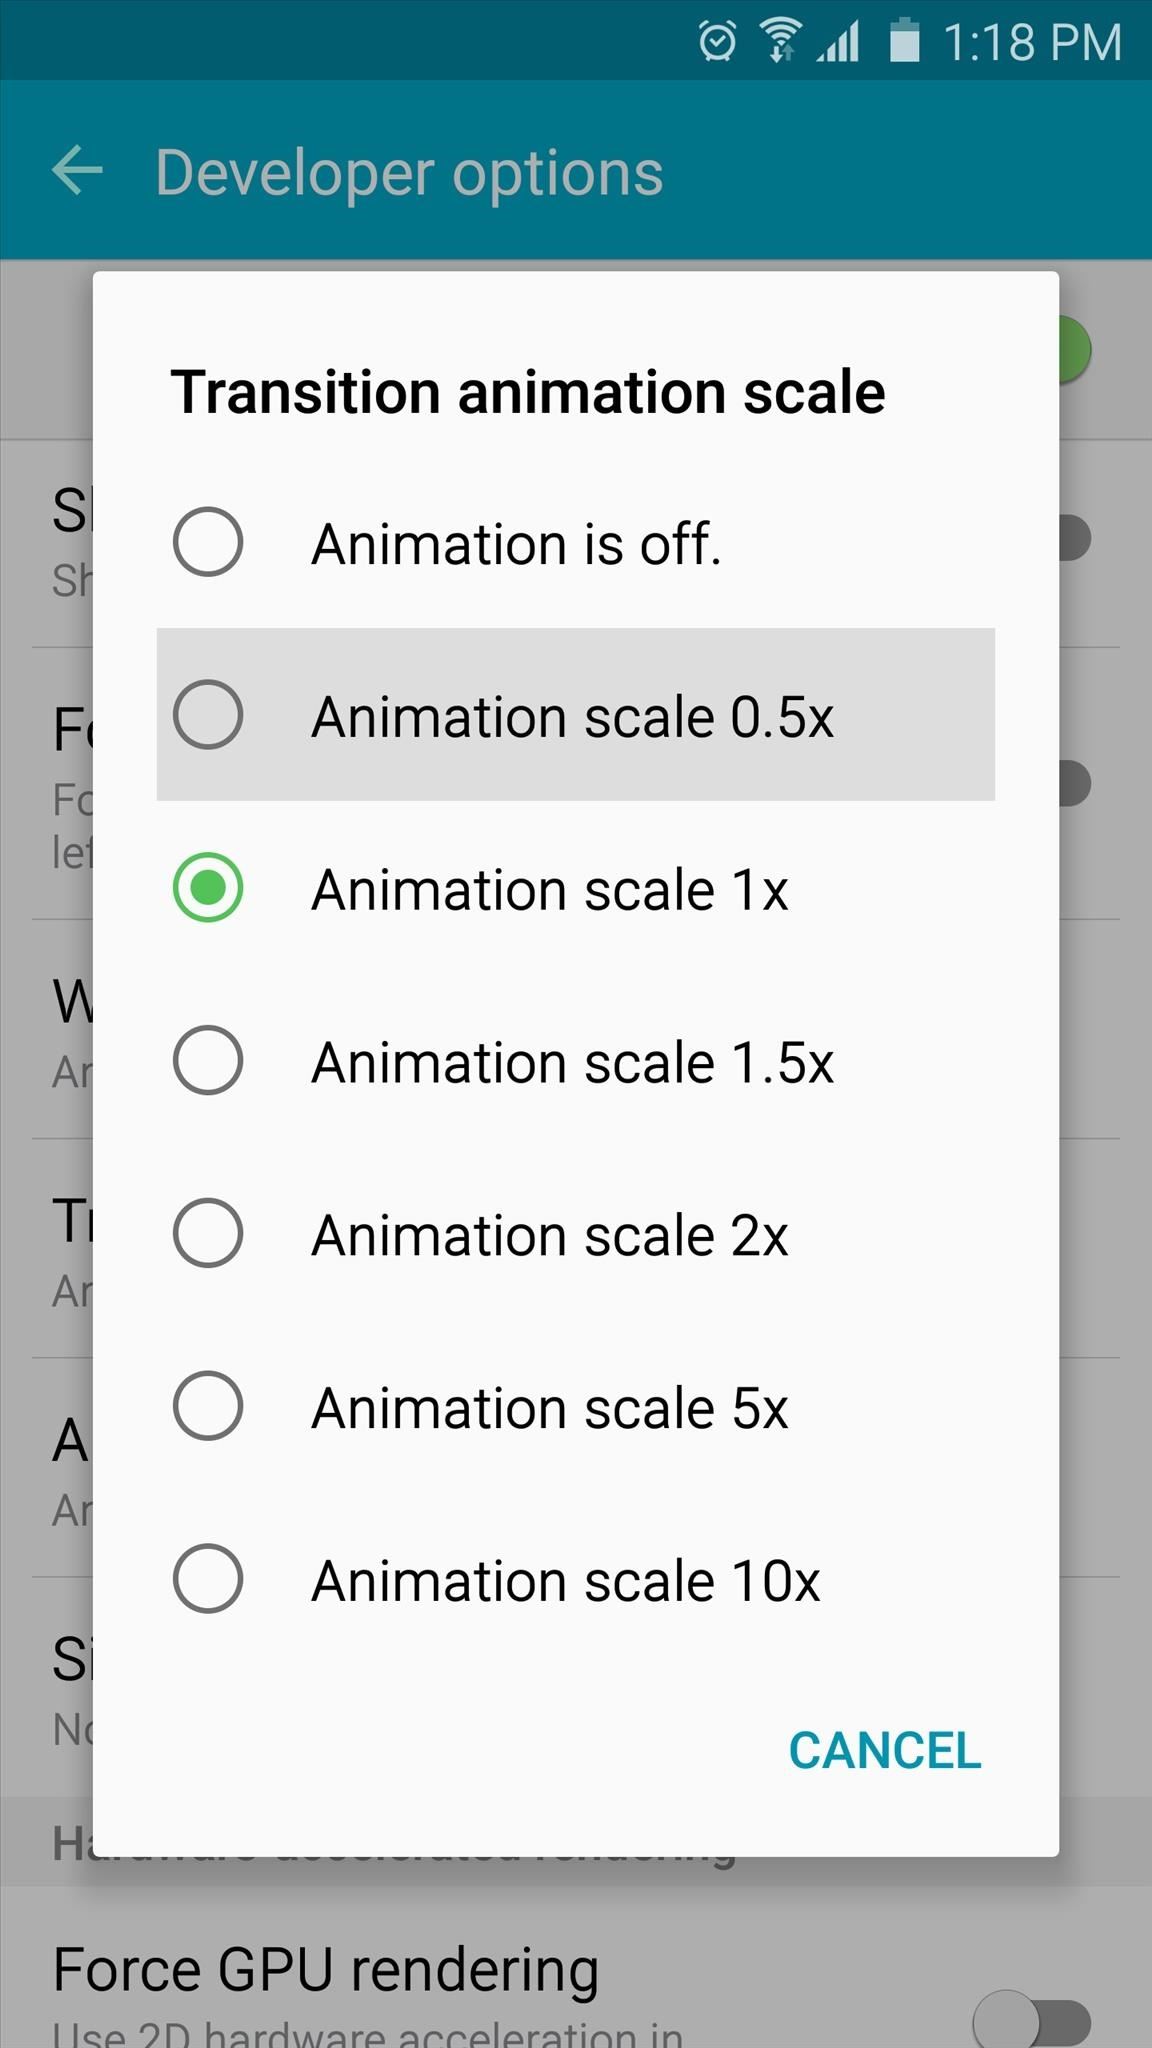
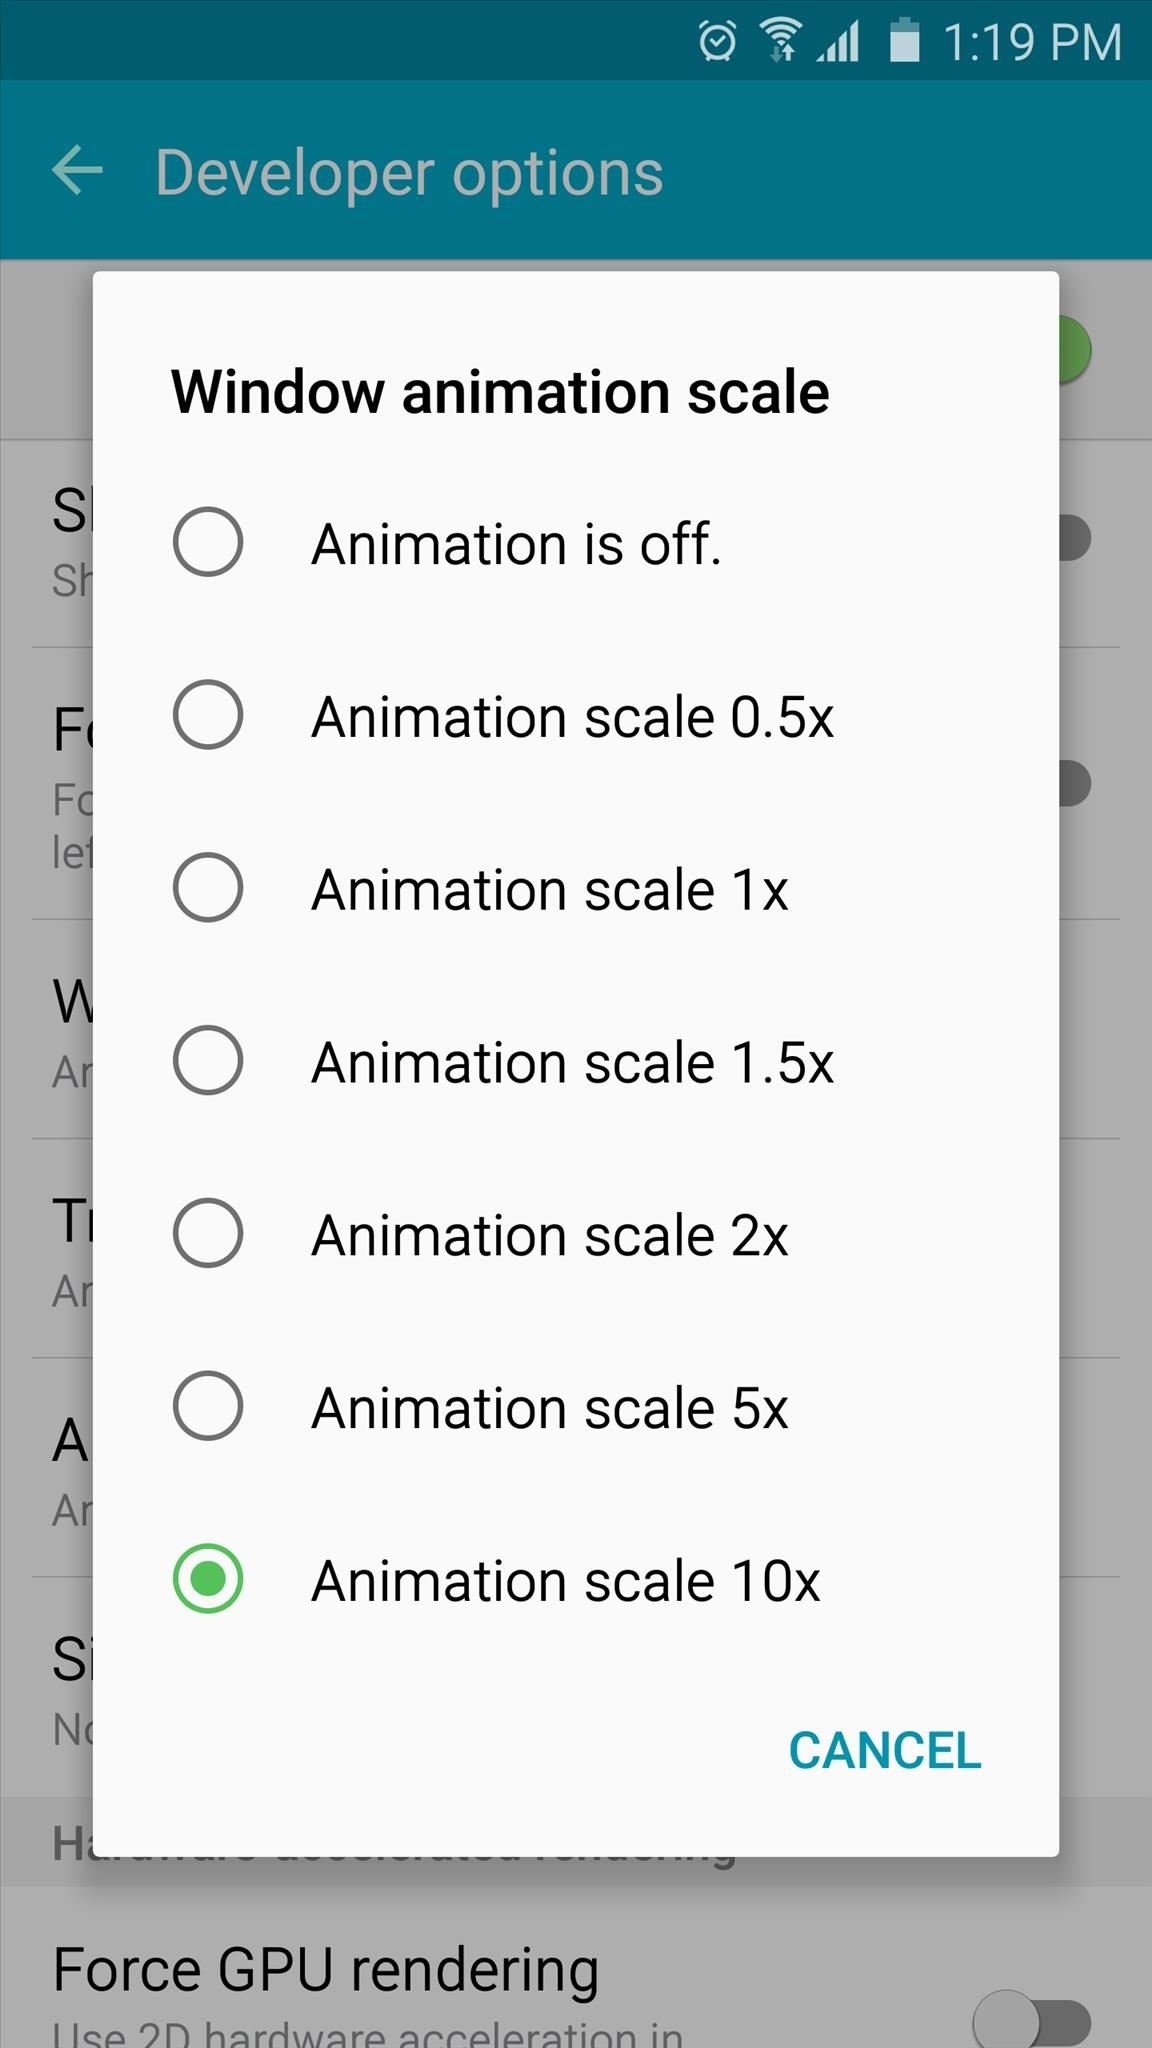
The next entry in our list is actually a set of two options that let you adjust the speed of transition animations. "Window animation scale" affects transitions that occur within apps (such as popups, for example), and "Transition animation scale" deals with the animations that take place when you're switching between apps. A third similar option, "Animator duration scale," only affects certain loading animations, so we'll skip over that one.
If you'd like to speed up the animations, set these options to a value lower than 1x, and almost magically, your phone will instantly feel a lot snappier. On the other hand, if you'd like to see the animations in slow motion, set the values to a higher number.
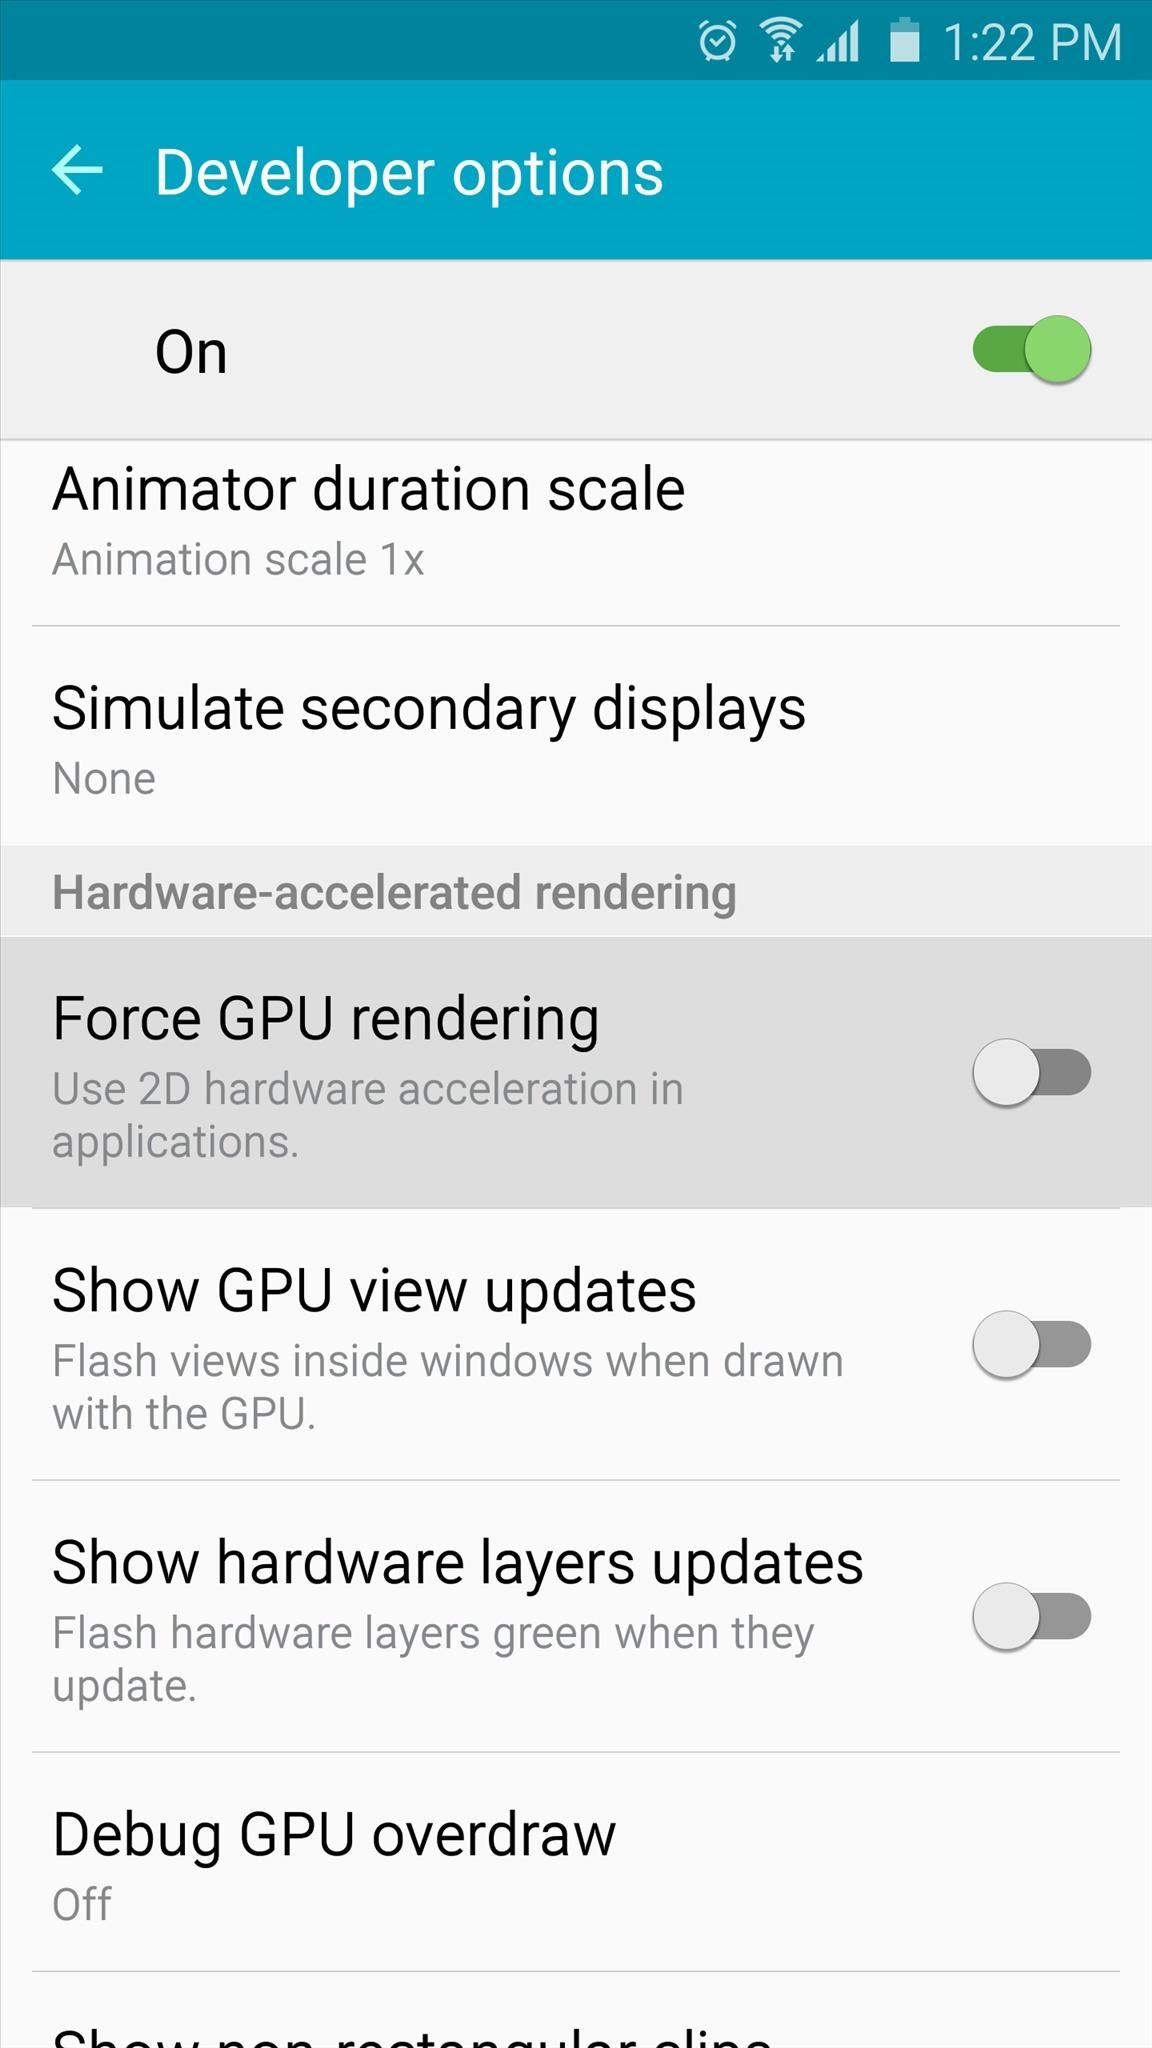
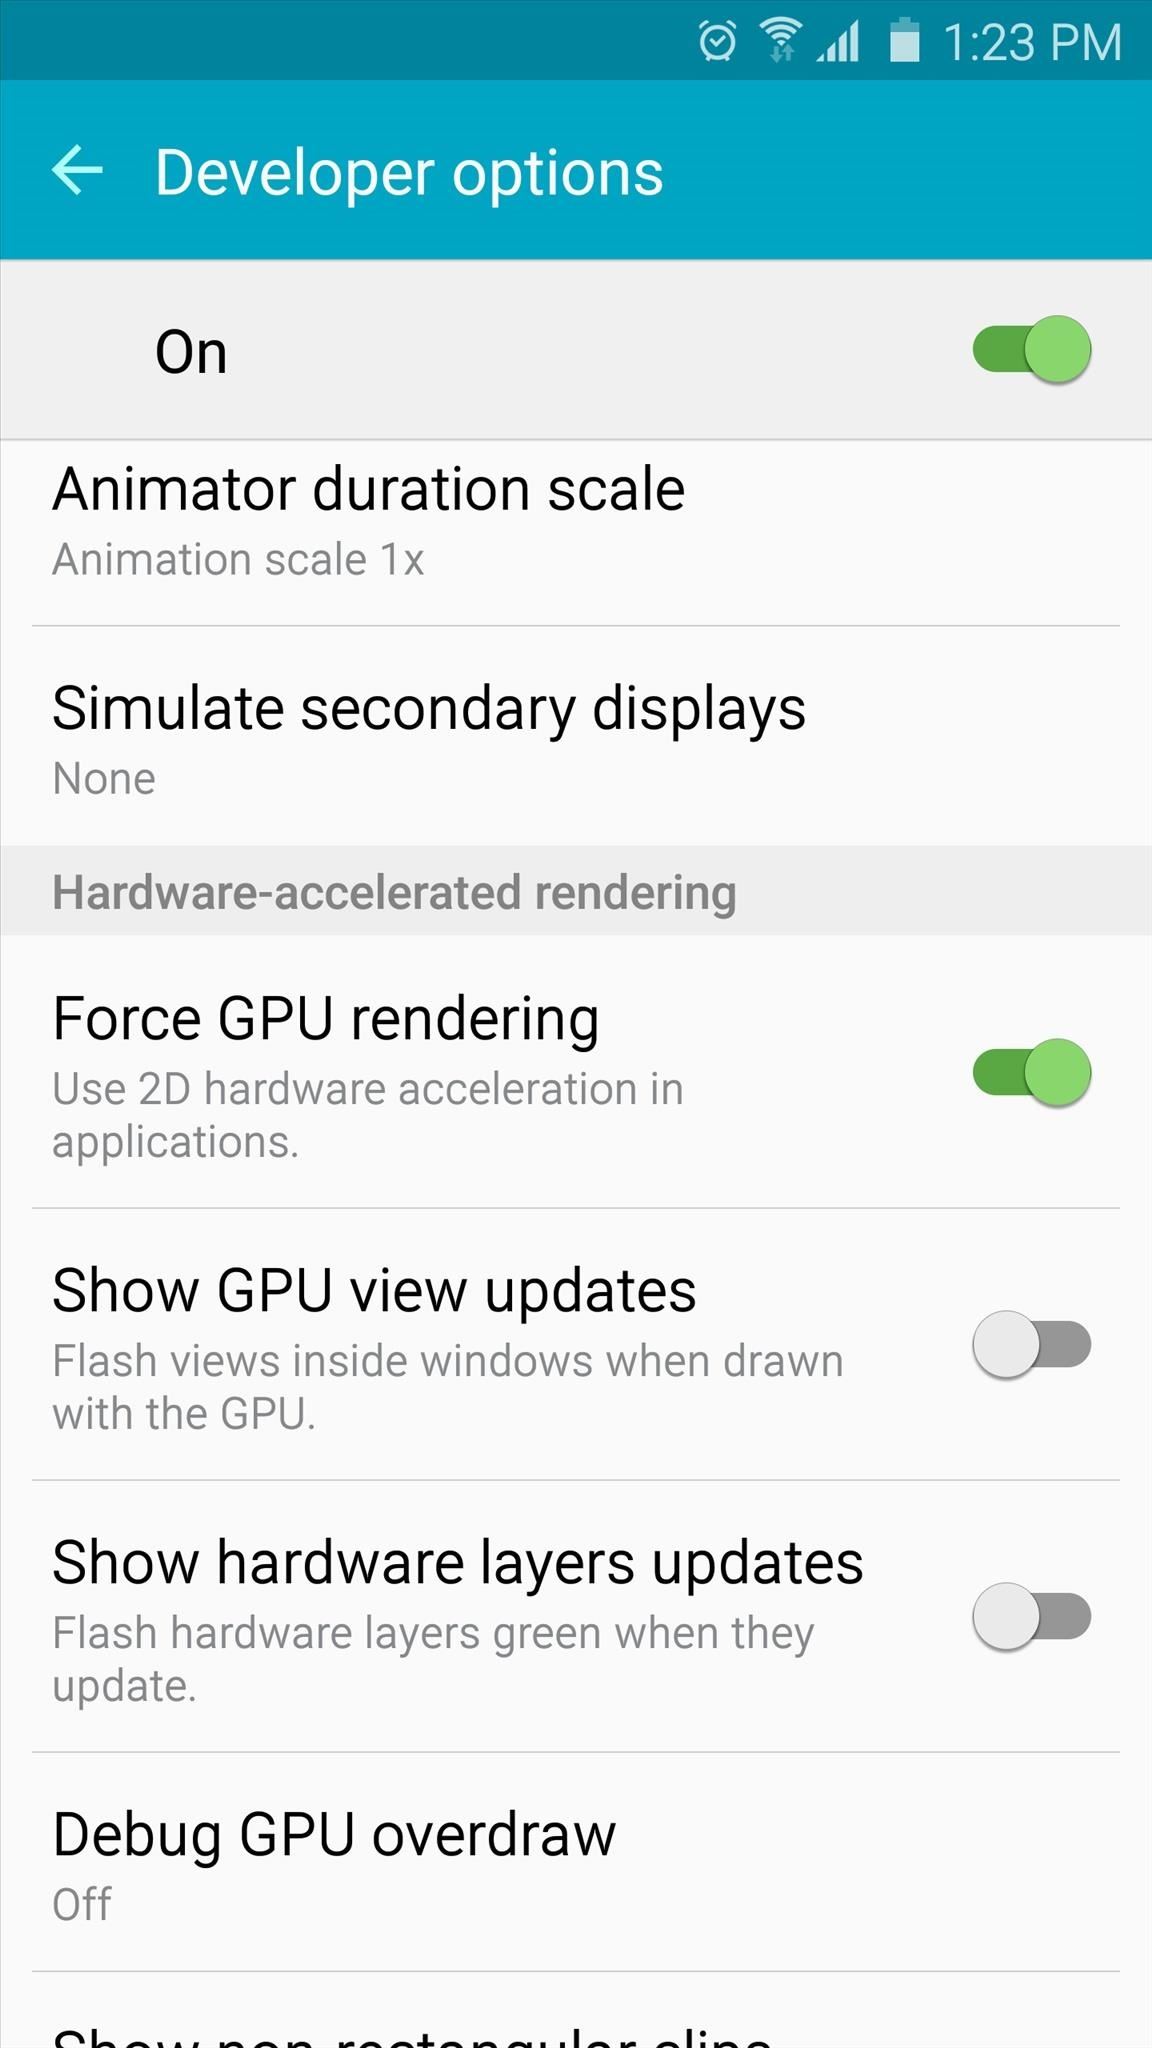
7: Force GPU Rendering
This next option might help if you're experiencing graphical sluggishness in some apps. As of version 4.0, Android now uses your device's dedicated graphics processor to render two-dimensional objects by default. Some apps, however, haven't been updated to take advantage of this faster method of rendering graphics.
So if you have any apps whose graphics seem to be rendering slower than the rest of your apps, enable the "Force GPU rendering" option. This will make sure that all apps take advantage of Android's hardware acceleration feature, which should make the user experience a lot smoother in some cases.
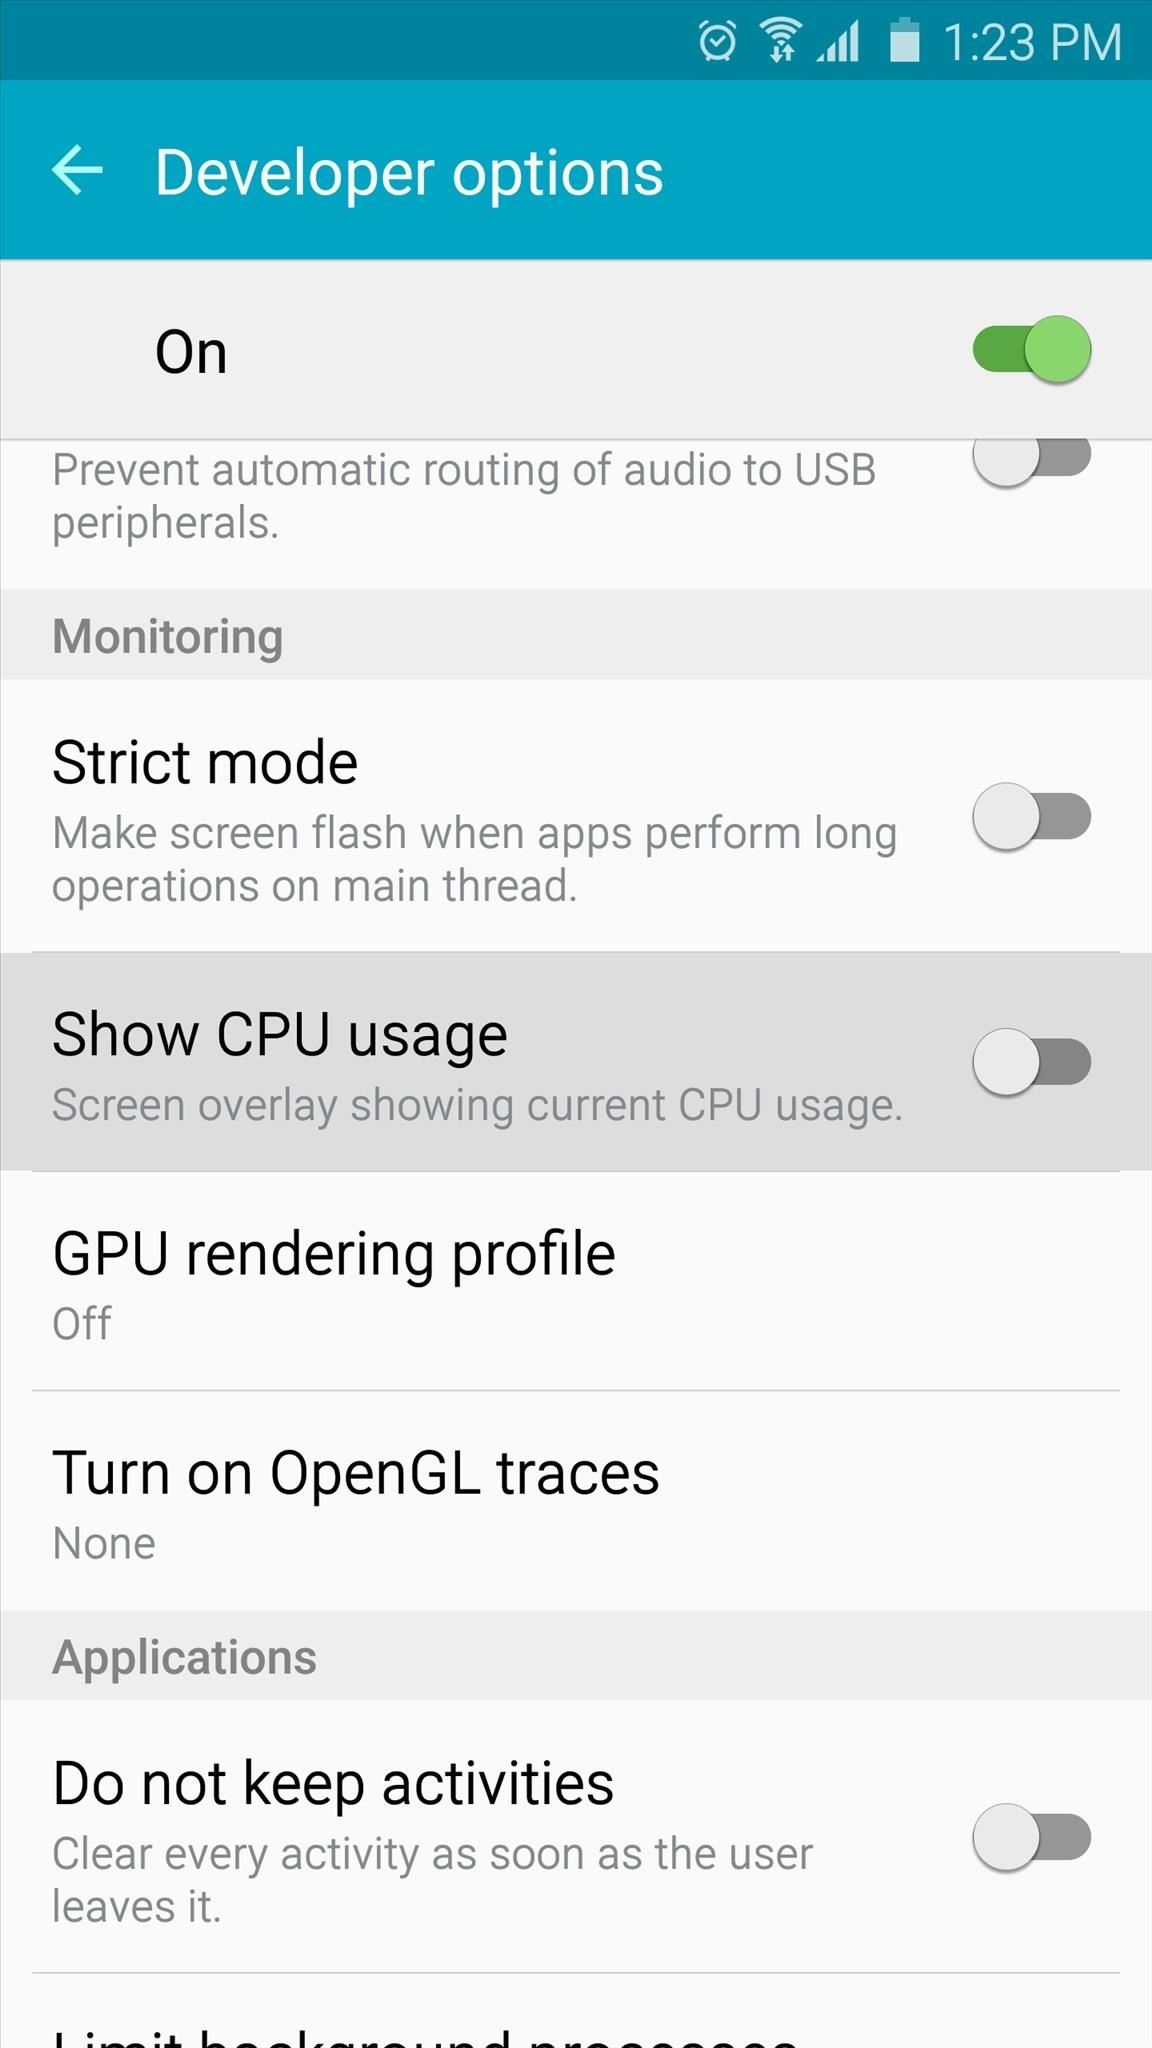
8: Show CPU Usage
This next option will come in handy if you've ever wondered what was going on behind the scenes on your Android device. Enable the "Show CPU usage" toggle, then you'll instantly see an overlay on your screen that shows you all of the processes that are currently running. These entries are ordered by their current CPU load, and your overall processor usage is shown as a bar graph at the top of the screen.
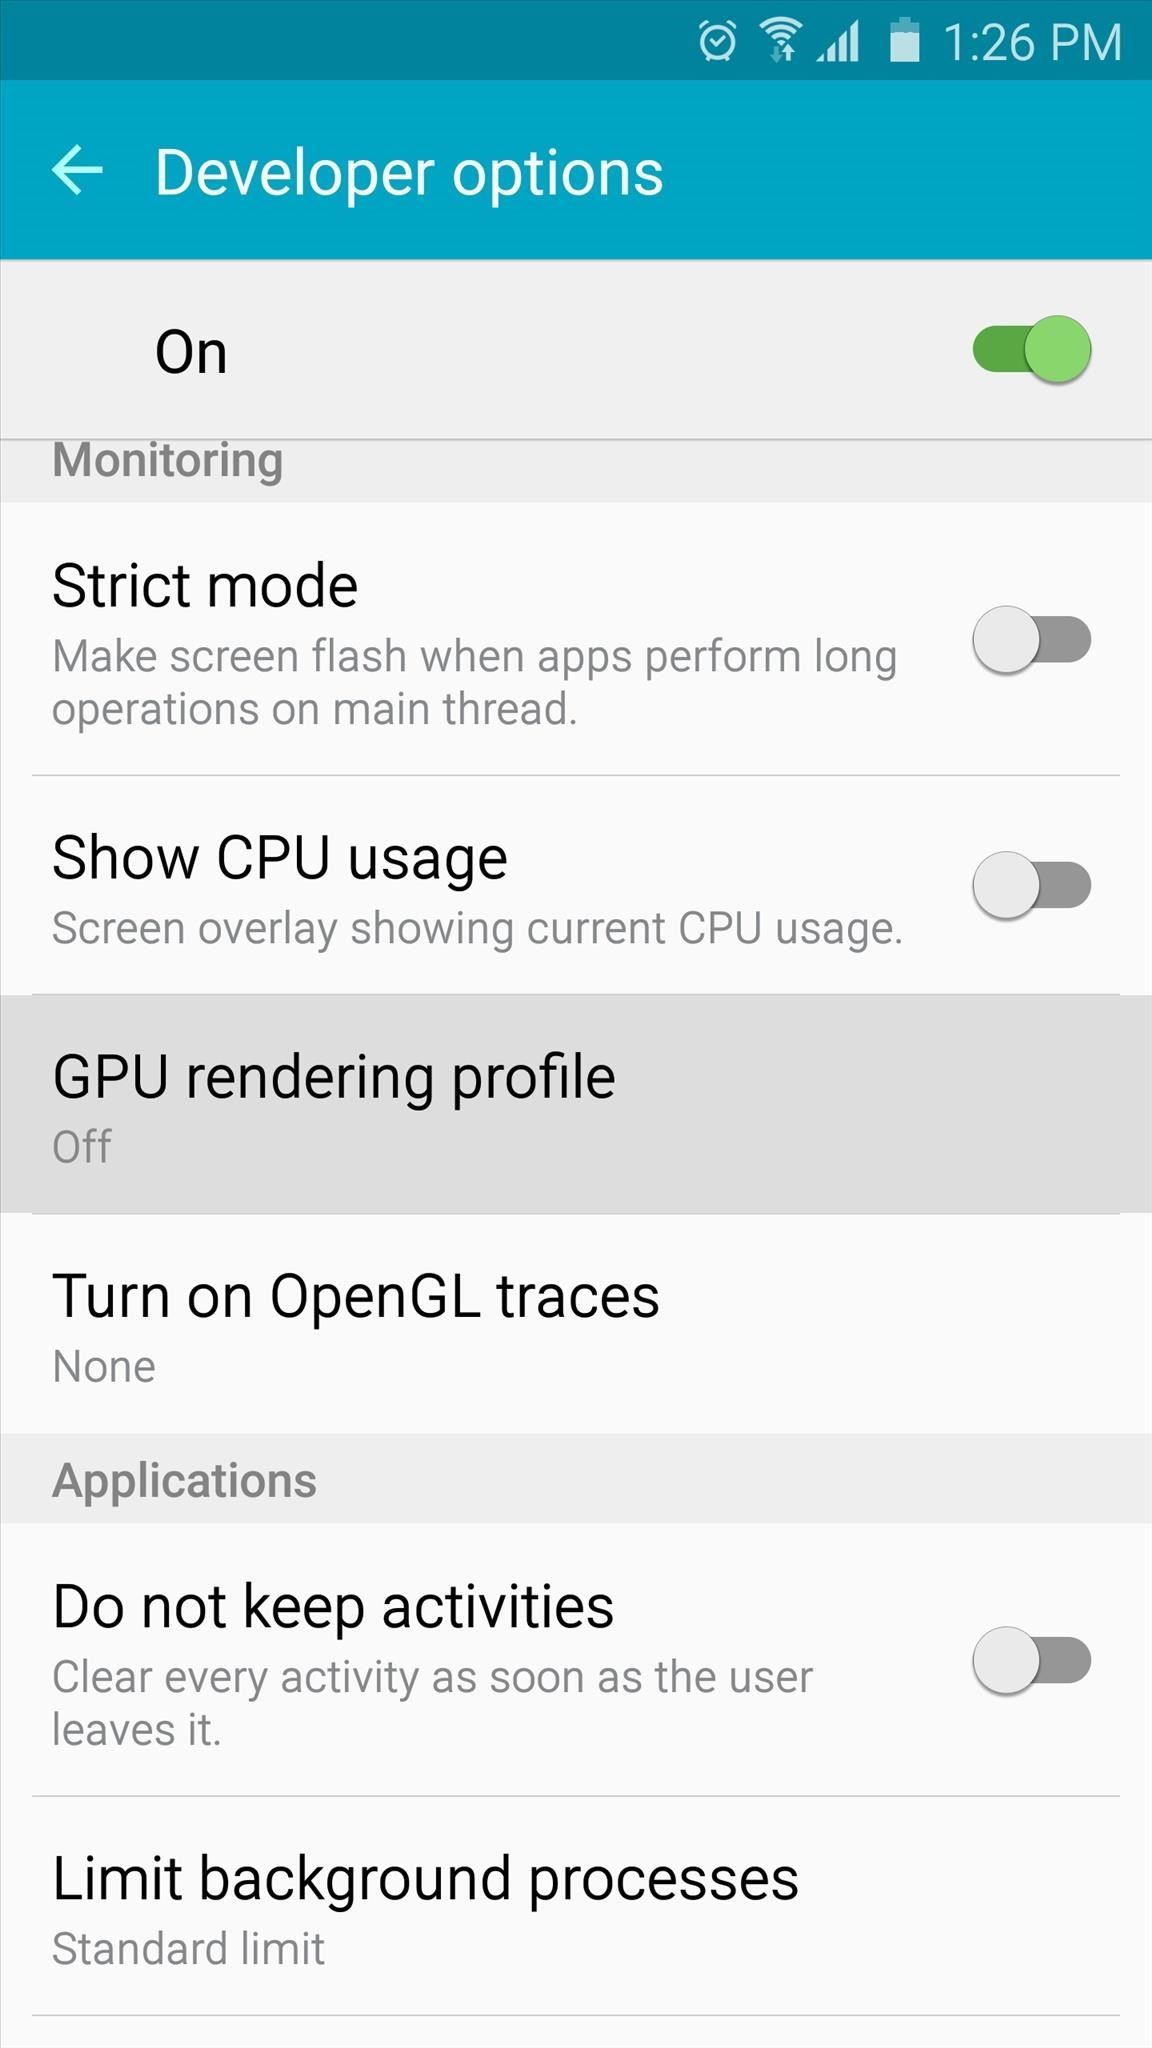
9: GPU Rendering Profile
If you'd like to test your device's graphics performance, select the "GPU rendering profile" option and set it to "Show on screen as bars." This can be a very useful way of comparing the graphics performance for different apps on your system, since the overlay will be shown on top of all screens.
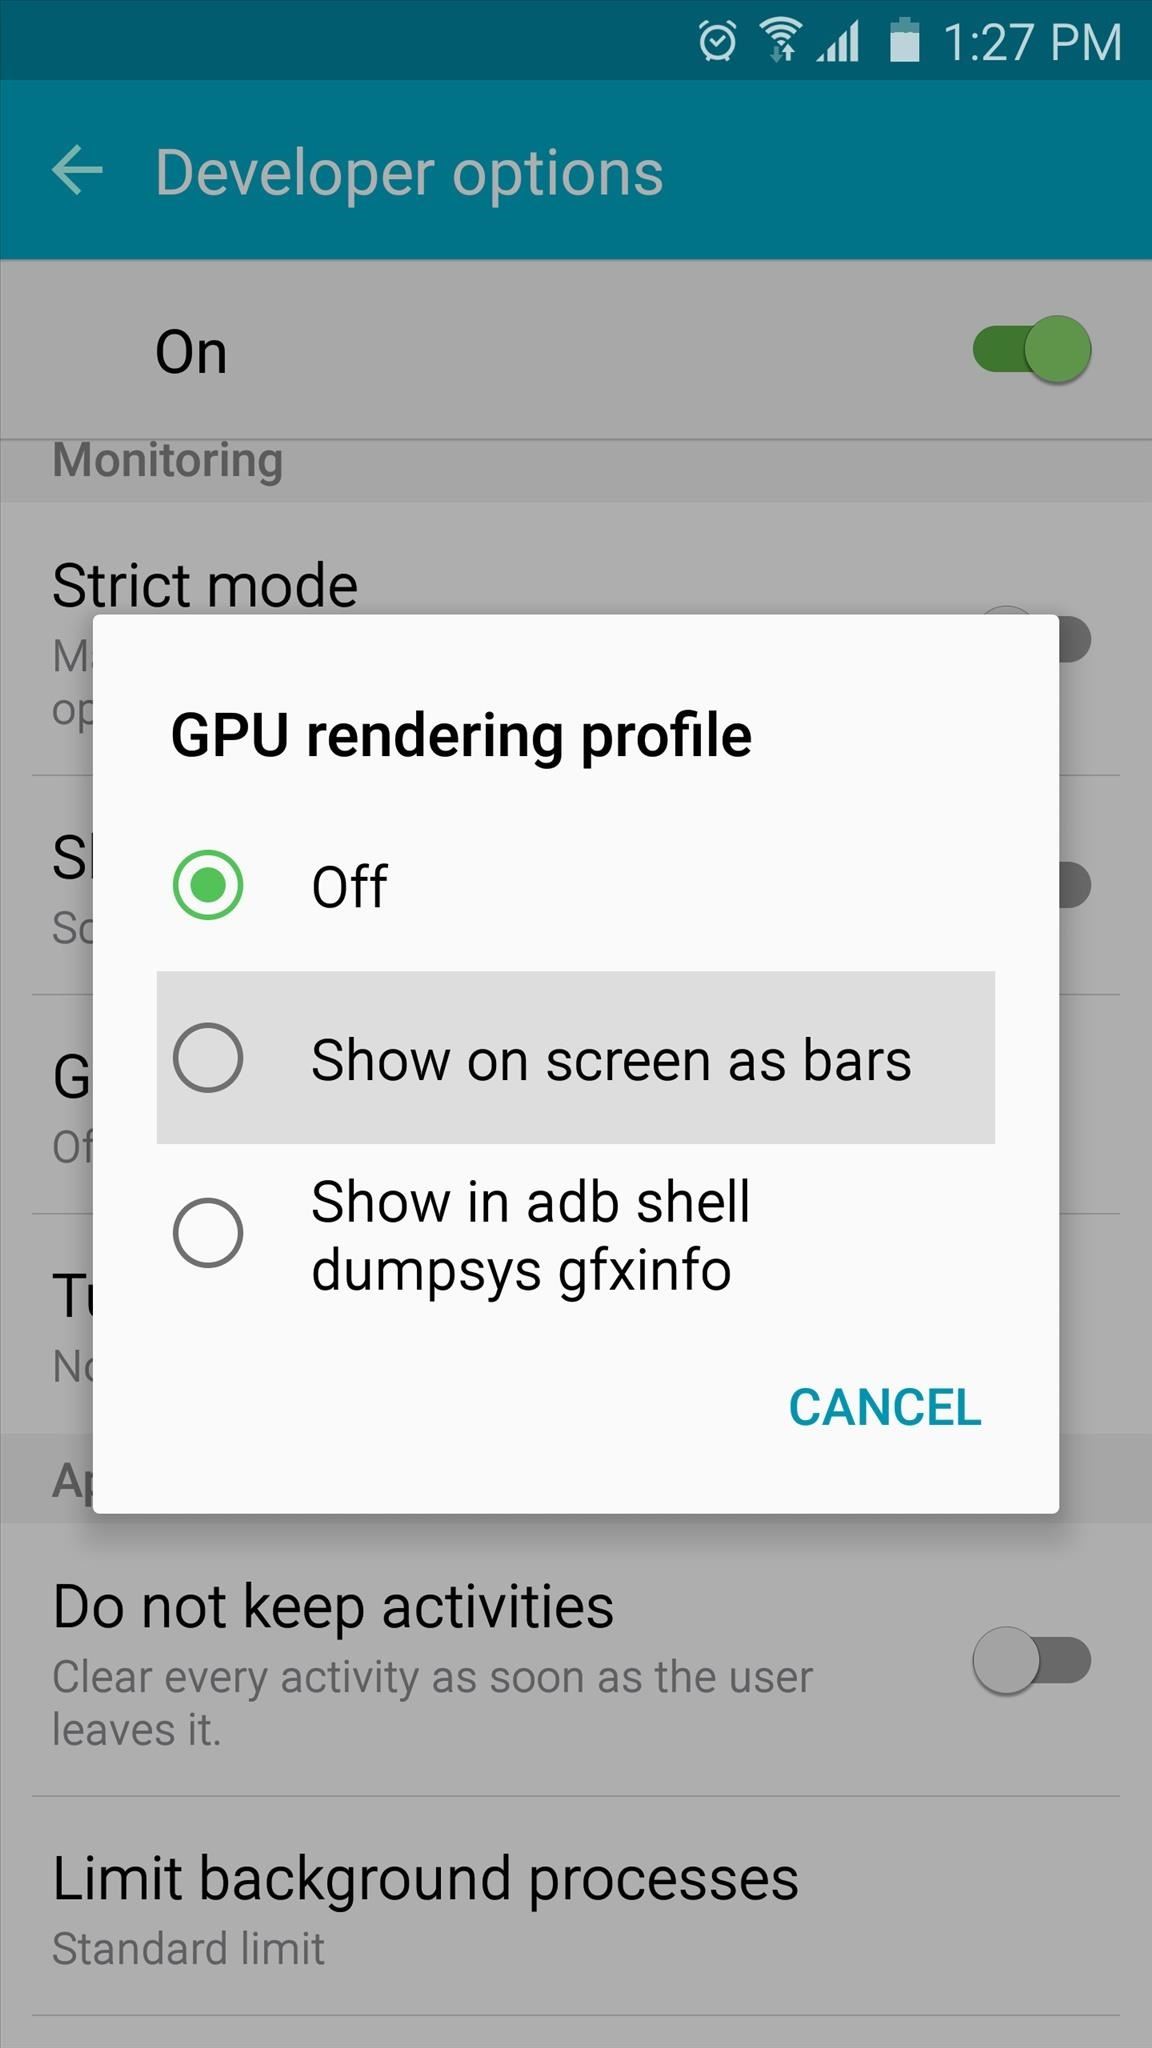
The condensed graph at the top of your screen shows recent graphics performance history, while the bars across the bottom of your screen depict graphics performance on the fly. Higher spikes mean there was a heavy GPU load at that moment, so in general, this is a great way to see if an app is dropping frames or performing poorly from a graphics standpoint.
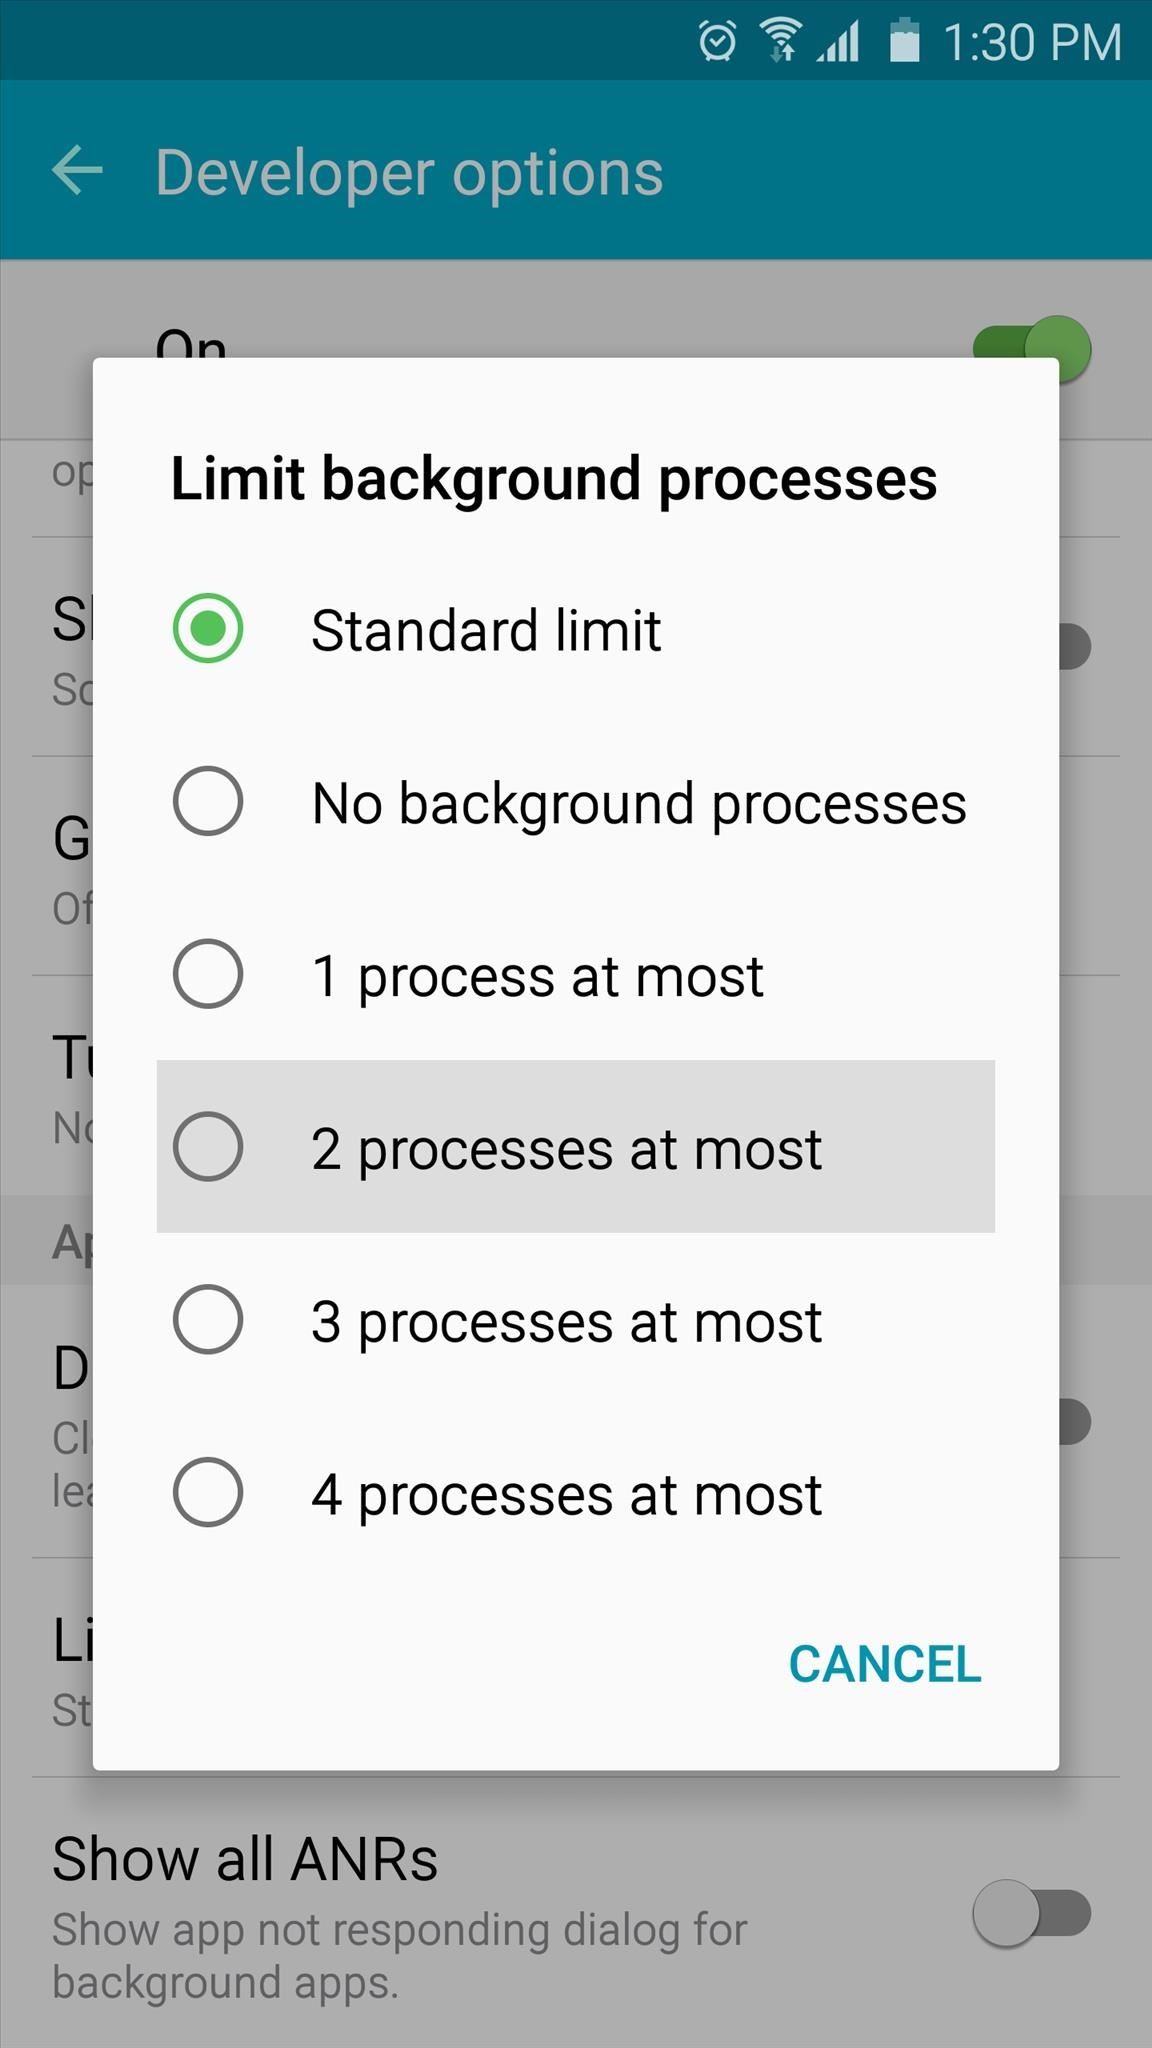
10: Background Process Limit
If your "Process stats" menu was looking abysmal earlier, or if your phone just doesn't have much RAM, you might want to look into this last option. Select "Limit background processes," then you can choose the amount of processes that are allowed to run in the background and eat up memory on your device. For instance, you can set this to "2 processes at most," then only the current app and the two most recent background processes will be allowed to run, which should free up a lot of memory on your device.

11: Force Apps into Split-Screen Mode
Split screen is a useful feature first introduced in Android 6.0 Marshmallow. This feature allowed users to view two apps simultaneously by dividing the screen into two sections. However, to use split-screen mode, the app must support the feature, which isn't always the case. For example, the ESPN app doesn't support split screen, which is annoying especially you want to watch a game while also view an article.
In Developer options, you can change this by enabling "Force activities to be resizable." Once activated, restart your device. Now all apps will support split-screen mode, even if the developers decided against it. Do note that this isn't a foolproof method. Since you are using a feature not intended to be used by the app, it may act buggy or crash a few times.

12: Force Apps to Install on SD Card
Android also includes an option to force apps to install on the SD card. While this feature is much older than split screen mode, there are still many apps which don't support it. Sure, this may affect much fewer users now (as many OEMs continue to create phones without microSD support), but installing apps on the SD card is still a useful way to conserve space.
By enabling "Force Allow Apps on External" and restarting your device, you will no longer be blocked by app developers — any app can be installed on your microSD card. However, this can break apps not designed for this method. Therefore, use trial and error to see which apps function correctly on the microSD card and which ones don't.

13: Enable 4x MSAA for More Realistic Graphics
Anti-aliasing is a technique used to improve digital images by reducing jagged edges. Since in the real world, not everything operates in straight lines, this technique allows for digital objects to be display more realistically. Especially in gaming, this technique helps gamers escape from world, as the things created in the game look more like their real-world counterparts.
There are a number of techniques used to accomplish anti-aliasing. One technique is MSAA, which Android supports in the form of 4x MSAA. 4x MSAA renders each image displayed by an app or game at a higher resolution (four times larger than the display resolution), then reduces the larger image to match your phone's screen. Using the additional pixels from the larger render, MSAA can reduce the jagged lines.
By enabling "Force 4x MSAA," you can force all games and apps using OpenGL ES 2.0 or higher to use the technique to improve the image. As a warning, this feature will increase battery consumption, so we only recommend it on a phone with a big battery.

14: Allow Ringtones Through Bluetooth Headphones
By default, whenever you are using a Bluetooth headset and you receive an incoming call, you will hear a generic ringtone different from the one played on your phone. With the option "Enable in-band ringing" enabled, you can change this behavior so that you hear your ringtone through your Bluetooth headset.

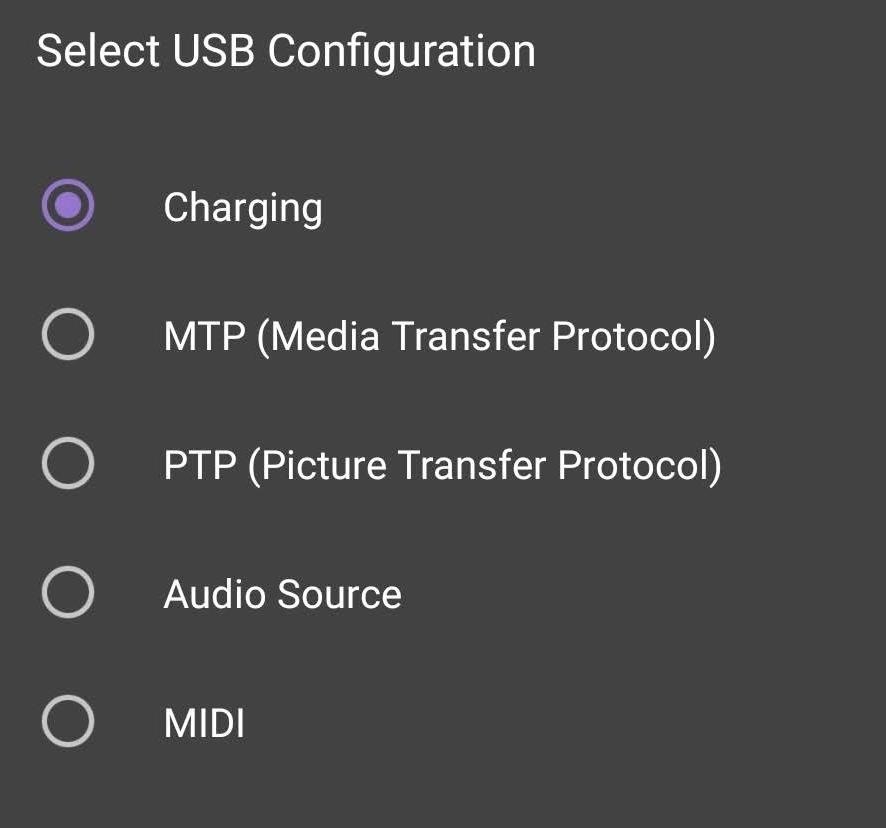
15: Change the Default USB Configuration
Whenever you connect your phone to another device via USB, by default, your phone will begin charging. Using a notification, you can adjust their action. However, Android also provides you the ability to change the default action, but this requires that you've unlocked Developer options first.
In the Developer options, tap "Default USB configuration," where you can modify what your phone first does when connected via USB. When you select "Default USB configuration," you will be presented with five options: File transfer, USB tethering, MIDI, PTP, and No data transfer.
File transfer will change your device to USB mass storage, allowing you move files between the phone and the other device (such as your computer). USB tethering will let you share your device's data connection without another device, effectively turning it into a wireless adapter.
MIDI (Musical Instrument Digital Interface) enables your phone to communicate with musical instruments and other sound producing equipment. And PTP (Picture Transfer Protocol) will make your phone appear as a digital camera when connected to a computer. While it is similar to MTP, it does offer some additional features such as the ability to grab photos from the phone (while in this mode) and move them to the computer.
Which of these cool Developer options entries is your favorite? Let us know in the comment section below.
Who needs a wand? Unlock your magical powers and transform yourself from a Muggle into a Wizard or Witch just by using your Android phone. See how:


3 Comments
Running Lollipop 5.1, the issue I have is with the Background Process Limit. Every time I restart my device the setting goes back to Standard Limit. Is this something that cannot be fixed?
The issue I have with the usb transfer protocol on my Samsung j7 prime is that, I have to go to developer options every other time I connect a usb to my fone and it's really annoying, plus I have to go to settings every time I need to turn on/off my data, it's really annoying...
Ok I figured out how to make the usb configuration work, all I had to do was restart my fone after selecting the configuration mode I preferred and that settled that, but I still can't figure out how to include data icon above the notification panel, so I dont have to go to settings every time I need to turn on/off my data. I would really appreciate any insight to a solution
Share Your Thoughts